Files erased with Disk Utility can sometimes be recovered, but the window is narrow and closes fast. Whether your data is retrievable depends on three factors: which erase option you used, whether your Mac has a T2 chip or Apple Silicon, and how many writes have hit the drive since the erase. Stop all disk writes immediately. Power down the Mac if you can do so safely, and call Macwest Data Recovery at 310-866-0828 for a free diagnostic and same-day appointment before anything else changes on that drive.
Key Takeaways
Files erased with Disk Utility can sometimes be recovered through professional in-lab techniques, but success depends entirely on the erase type, drive firmware, encryption status, and how quickly you stop all writes to the device.
| Point | Details |
|---|---|
| Stop writes immediately | Every write after a Disk Utility erase overwrites recoverable data; power down the Mac at once. |
| Erase type determines odds | Quick format on an HDD offers the best recovery odds; cryptographic erase on T2/Apple Silicon is effectively unrecoverable. |
| TRIM and encryption narrow the window | SSDs with RZAT firmware or active FileVault encryption sharply reduce what any lab can retrieve. |
| Check backups before scanning | APFS snapshots and Time Machine backups are the fastest recovery path and should be verified first. |
| Macwestlosangeles | Free diagnostics, “no recovery, no charge,” and same-day appointments since 2006 at 310-866-0828. |
Table of Contents
- What to do in the first 0–24 hours after a Disk Utility erase
- How Disk Utility, APFS, SSD/TRIM, and FileVault affect recoverability
- What an in-lab Mac data recovery workflow looks like
- Realistic success rates, turnaround times, and cost ranges
- What to expect from the lab intake and diagnostic process
- How to choose a reputable Mac data recovery lab
- When an erased drive is not securely wiped
- A technician’s perspective on what actually matters
- Macwest Data Recovery & Mac Repair: in-lab service for erased Macs
- Sources
- FAQ
What to do in the first 0–24 hours after a Disk Utility erase
Every write to the drive after an erase overwrites the data you are trying to recover. The steps below are listed in priority order.
- Power down the Mac as soon as you realize what happened. Do not let it idle, sync, or run background processes.
- Do not reinstall macOS, run Disk Utility First Aid repeatedly, or initialize the disk again. Each of those actions writes to the volume.
- Do not install recovery software on the affected drive. Boot from an external drive or a second Mac in Target Disk Mode instead.
- Check for APFS local snapshots and Time Machine backups first. These are the fastest recovery path and require no sector scanning.
- If the drive makes clicking sounds or disconnects intermittently, stop all attempts immediately and bring the device to a lab. Continued scanning on a failing drive risks permanent loss.
- Note the exact Disk Utility erase option you used, the macOS version, and whether FileVault was active. That information directly shapes the recovery strategy.
Pro Tip: Before touching anything else, boot a second Mac, connect your affected drive in Target Disk Mode, open Terminal, and run diskutil list. Save the output to a different device. Then take a screenshot of Disk Utility with “Show All Devices” enabled. That snapshot tells a lab exactly what partition scheme and APFS container structure remain.
How Disk Utility, APFS, SSD/TRIM, and FileVault affect recoverability
Not all erases are equal. The term “disk utility erase recovery” covers a wide range of scenarios, and the technical mechanism behind each one determines whether a professional lab can help.
Quick erase (default format) rebuilds the filesystem metadata but typically leaves user data sectors intact until new writes overwrite them. On a conventional HDD or an external drive, this is the most recoverable scenario. On an internal SSD, the picture is more complicated.
SSD TRIM behavior is the critical variable. Drives implementing Deterministic Read After TRIM (DRAT) may return prior data for a short window after an erase. Drives implementing Read Zero After TRIM (RZAT) return zeros immediately, making software-based recovery unlikely. Recovery odds depend more on the drive’s controller firmware than on which OS tool performed the erase.
T2 and Apple Silicon encryption is the hardest wall. When you use “Erase All Content and Settings” on a supported Mac, the secure enclave discards the volume encryption keys. The raw NAND may still physically exist, but the result is cryptographic junk that no recovery tool can decode without those keys.
| Erase scenario | Drive type | Expected recoverability |
|---|---|---|
| Quick format, no TRIM, no encryption | HDD or older external | Good — logical recovery often possible |
| Quick format, TRIM active, no encryption | Internal SSD (DRAT) | Moderate — narrow window, act within hours |
| Quick format, TRIM active, no encryption | Internal SSD (RZAT) | Low — zeros returned after TRIM |
| Secure overwrite (multi-pass) | HDD or SSD | Very low — data sectors overwritten |
| Cryptographic erase / Erase All Content | T2 or Apple Silicon Mac | Effectively zero without the encryption key |
Background TRIM cycles continue running even after you power the Mac back on, which means every minute of uptime on an SSD after a quick erase narrows the recovery window further.
What an in-lab Mac data recovery workflow looks like
Professional labs follow a structured escalation path designed to avoid making the situation worse. Aggressive end-user attempts — reinstalling macOS, running Disk Utility repair, or installing recovery software on the affected drive — consistently lower recovery chances before a lab ever sees the device.
- Intake and free diagnostics. Visual inspection, connectivity test, and an initial read attempt to classify the failure type (logical, firmware, or physical).
- Forensic imaging. Where the drive is stable enough, the lab creates a sector-by-sector image and works from that copy, preserving the original.
- Logical recovery. File-signature scanning and APFS metadata reconstruction on the image to locate recoverable files.
- Firmware and component repair. If the drive’s firmware is corrupted or a logic board component has failed, component-level repair may restore drive communication before imaging is even possible.
- NAND/chip-off recovery. For drives that cannot be imaged conventionally, the NAND flash chips are accessed directly. This requires cleanroom conditions and specialized reading hardware.
- Verification and delivery. Recovered files are verified for integrity and delivered via encrypted transfer or on a new storage device.
Labs prefer to work from an image rather than the original because every read/write cycle on a degraded drive carries risk. If the drive shows physical failure symptoms, firmware repair or chip-off procedures come before any logical scan.
Realistic success rates, turnaround times, and cost ranges
Success rates and costs vary significantly by scenario. The table below reflects conservative professional estimates, not guarantees.
For conventional HDDs erased with a quick format, recovery success with consumer software is often good if no writes followed; for internal SSDs with TRIM and encryption, success rates drop sharply. Same-day triage is available for urgent cases. “No recovery, no charge” policies cover the recovery fee itself; emergency service fees, imaging charges, or parts costs may apply separately and will be disclosed upfront.
What to expect from the lab intake and diagnostic process
A reputable lab’s diagnostic process is designed to give you a clear picture before you commit to anything.
- Free diagnostics cover a visual inspection, a connectivity and read test, and an initial assessment of whether logical, firmware, or physical recovery is needed.
- “No recovery, no charge” means you pay the recovery fee only if files are successfully retrieved. Ask specifically what fees apply if recovery is not possible (emergency handling, imaging, or parts).
- Chain of custody documentation tracks your device from intake through delivery. A professional lab provides written confirmation at each stage.
- Same-day appointments are available for business-critical data loss. Call ahead so the lab can prepare the right equipment.
- Secure data transfer options include encrypted delivery or in-person pickup on a new drive. Confirm the lab’s data handling policy before drop-off.
How to choose a reputable Mac data recovery lab
Use this checklist before handing over any device.
Questions to ask:
- Do you offer free diagnostics with no obligation?
- Do you have a written “no recovery, no charge” policy, and what fees apply if recovery fails?
- Do you have direct experience with APFS, NVMe, T2, and Apple Silicon drives?
- Do you have a cleanroom and component-level logic board repair capability?
- Can you explain your chain of custody and data confidentiality practices?
Red flags to watch for:
- Vague or verbal-only guarantees with no written quote
- No cleanroom or chip-off capability for physical failures
- Unwillingness to explain what happens to your data after recovery
- Pressure to approve work before diagnostics are complete
What to bring:
- The Mac or drive (do not reinstall or reformat again before drop-off)
- The Mac model, serial number, and macOS version
- Whether FileVault was enabled and the approximate date of the erase
- Any error messages or unusual behavior you observed
When an erased drive is not securely wiped
A quick Disk Utility erase is not a secure wipe. If a forensic lab can still recover your data, so can someone else.
- FileVault enabled before handover is the most practical protection for most users. If the drive was already encrypted and you perform a quick erase, the data is cryptographically inaccessible without the key.
- Cryptographic erase via “Erase All Content and Settings” on T2 or Apple Silicon Macs destroys the volume key and provides strong protection. The role of encryption in Macs explains this mechanism in detail.
- Multi-pass secure overwrite is rarely appropriate for SSDs because it accelerates wear and may not reach all NAND blocks due to over-provisioning. It remains an option for HDDs.
- Physical destruction or drive replacement is the correct choice when handling regulated data (HIPAA, legal, financial) and you need to guarantee irrecoverability. Replace the storage device entirely rather than relying on software-based methods.
Pro Tip: If you are preparing a Mac for resale and are unsure whether FileVault was active, enable it, let it finish encrypting, then perform the erase. That sequence closes the recovery window regardless of TRIM behavior or drive type.
A technician’s perspective on what actually matters
The cases that arrive at a lab in the worst shape are rarely the ones with the most severe erase. They are the ones where someone spent two days running recovery software on the affected drive, reinstalled macOS twice, and then called for help. By that point, the original filesystem metadata that a lab could have used for APFS reconstruction has often been overwritten.
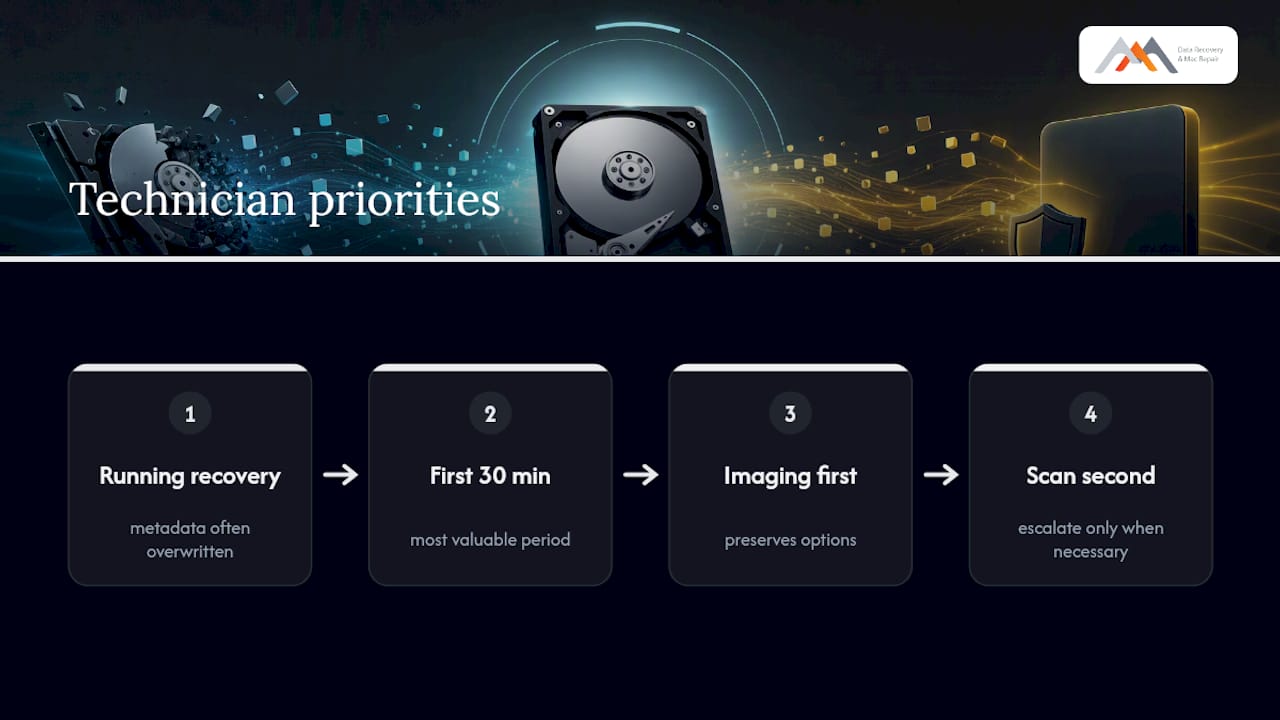
The labs that have been doing this since 2006 know that the first 30 minutes after an accidental erase are more valuable than any tool. Imaging first, scanning second, and escalating to firmware repair or chip-off only when necessary — that sequence exists because it preserves options. Every step that writes to the original drive removes one.
Macwestlosangeles has handled APFS, NVMe, and RAID (0, 1, 3, 5) recovery cases since well before those formats were mainstream. Free diagnostics and a “no recovery, no charge” policy are not marketing language here; they reflect the reality that some drives, particularly those with cryptographic erases, cannot be recovered, and clients should not pay for an outcome that is physically impossible.
Macwest Data Recovery & Mac Repair: in-lab service for erased Macs
When a Mac has been erased or reformatted and the data matters, the fastest path to a real answer is a free diagnostic from a lab with the right equipment. Macwestlosangeles offers in-lab hard drive and SSD data recovery covering APFS, NVMe, RAID (0, 1, 3, 5), and component-level logic board repair, with same-day appointments available for urgent cases.
Call 310-866-0828 or bring your device to 12041 Wilshire Blvd, Ste 26, Los Angeles (West LA, near UCLA and the Getty Center). Macwestlosangeles serves West LA, Santa Monica, Beverly Hills, Brentwood, Westwood, Venice, Hollywood, and Culver City. The diagnostic is free, the quote is written, and you pay the recovery fee only if files are successfully retrieved. Book your same-day appointment or call now.
Sources
- Can the data on an MacBook Pro SSD be recovered after formatting using Disk Utility? – Apple Stack Exchange
- APFS File Recovery After Disk Utility Erased My Drive, Any Advice? – Data Recovery – Beginrescueend Forum
- Rapidrepair
- How to Recover Erased Hard Drive on Mac Step-by-Step – CleverFiles
FAQ
Can files be recovered after a Disk Utility erase on a Mac?
Sometimes. A quick erase on an HDD or older external drive often leaves data intact until overwritten; a cryptographic erase on a T2 or Apple Silicon Mac is effectively unrecoverable because the encryption key is destroyed.
Does TRIM on an SSD prevent disk utility erase recovery?
TRIM significantly narrows the recovery window. SSDs implementing RZAT return zeros after TRIM, making prior data unreadable; drives using DRAT may retain recoverable remnants briefly, but the window closes within hours.
What should I do immediately after accidentally erasing my Mac hard drive?
Stop all disk writes, power down the Mac, and do not reinstall macOS or run Disk Utility again. Check for Time Machine or APFS snapshots first, then contact a professional lab for a free diagnostic.
How much does professional Mac data recovery cost after a Disk Utility erase?
Cost varies significantly depending on the case complexity, ranging from moderate fees for logical recoveries on HDDs up to several thousands of dollars for advanced chip-off procedures on physically damaged SSDs. Macwestlosangeles provides free diagnostics and written quotes before any work begins.
Does FileVault make recovery impossible?
If FileVault was active and the encryption key was destroyed during the erase, recovery is effectively impossible without that key. If FileVault was active but the key is still accessible (for example, via iCloud recovery key), a lab may still be able to help.