TL;DR:
- External hard drives that do not turn on often face power supply issues or internal hardware failures. Diagnosing with known-good cables and testing USB ports help determine if the problem is electrical or mechanical, with warning sounds indicating potential damage. Professional recovery is necessary if symptoms like clicking, grinding, or beeping occur, as DIY attempts can worsen the damage and reduce data recovery chances.
An external hard drive not turning on is defined as a failure to spin up, power on, or be detected by a computer, caused most often by a power supply fault, a damaged cable, or internal hardware failure. Stop all disk writes immediately if your drive was previously detected and has now gone silent. The right diagnostic sequence protects your data and, in many cases, restores access without professional intervention. Understanding whether the fault is electrical or mechanical determines every step that follows.
What causes an external hard drive not to turn on?
The most reliable first step is isolating the power source and testing with known-good cables and direct motherboard USB ports. Power isolation is the single most effective action because the majority of no-power failures trace back to insufficient current, not a dead drive.
Two drive sizes have different power requirements, and confusing them causes unnecessary panic:
- 3.5-inch desktop drives require a dedicated 12V/2A power adapter. Plugging one into a laptop USB port will almost always fail to spin the drive up.
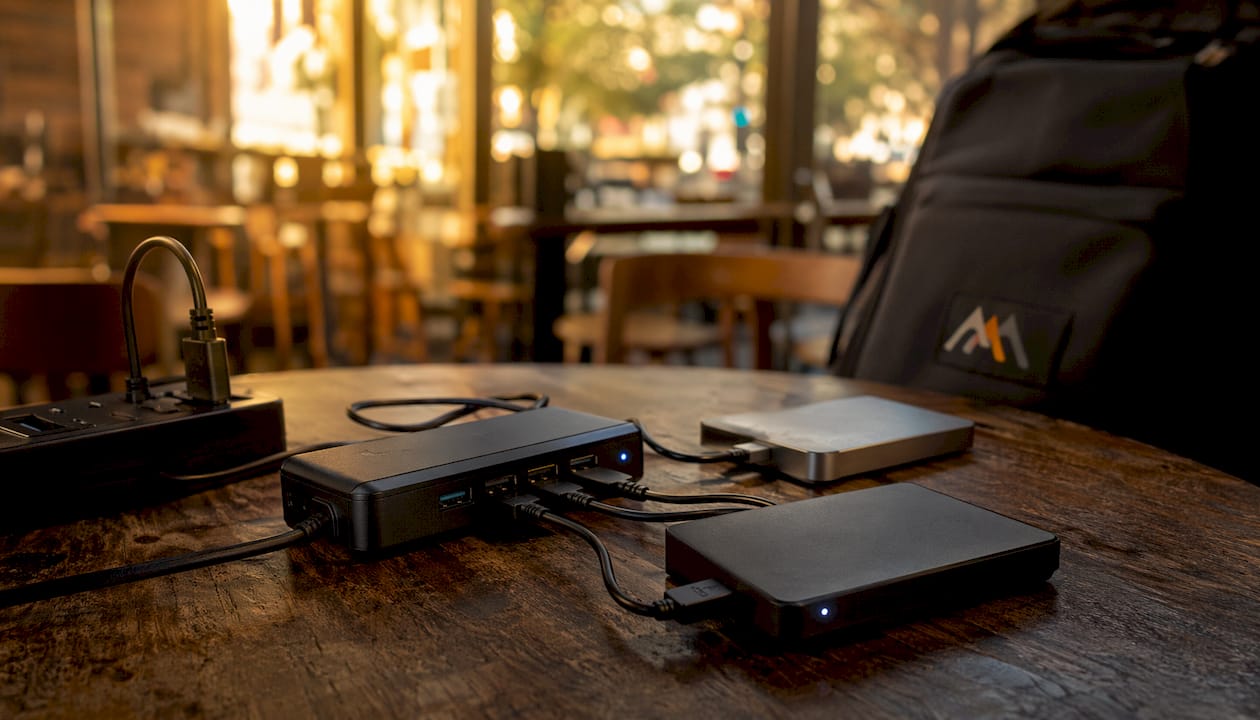
- 2.5-inch portable drives draw power from USB alone, but laptop ports often deliver less current than the USB specification allows. A powered USB hub or a Y-cable that draws from two ports solves this.
- Rear motherboard USB ports deliver more stable current than front-panel ports or external hubs. Always test there first.
- Damaged or worn USB cables are a frequent culprit. The cable that ships with a drive is often the weakest link after a year of use.
Pro Tip: Disconnect the drive completely, wait 2–5 minutes to let any residual charge dissipate, then reconnect to a rear motherboard port with a replacement cable before drawing any conclusions about hardware failure.
Powered USB hubs and Y-cables resolve many insufficient-power problems for both 2.5-inch and 3.5-inch drives. That single fix eliminates the most common cause of an external HDD not powering on before you touch any software tool.
How do you recognize mechanical failure vs. a power fault?
Mechanical failure produces distinct physical symptoms that a power fault does not. Beeping signals motor or spindle seizure, which means the drive’s read/write heads cannot move and the motor is straining against a locked mechanism. Clicking, grinding, or a rhythmic ticking sound indicates the same class of problem.
The symptoms that tell you to stop immediately:
- Beeping on power-up. The motor is seized or the heads are stuck to the platters.
- Clicking or “click of death.” The read/write heads are failing to find their home position repeatedly.
- Grinding or scraping. Platter or head damage is already occurring.
- No spin, no sound, no LED. Could be electronic (PCB failure) or mechanical. Do not assume it is safe to keep trying.
- Spinning but not detected. Often a firmware or PCB fault rather than a platter problem.
Repeatedly powering on a drive that beeps or clicks can cause irreversible platter damage. Each power cycle on a mechanically failed drive risks scoring the magnetic surface, destroying data that would otherwise be recoverable. The rule is simple: hear a warning noise, cut power immediately.
Testing detection in Device Manager or Disk Management helps separate electronic faults from mechanical ones. A drive that appears in Device Manager with errors but makes no abnormal sounds likely has a PCB or firmware issue. A drive that does not appear at all and makes clicking or beeping sounds has a mechanical fault requiring cleanroom recovery.
Step-by-step safe troubleshooting workflow
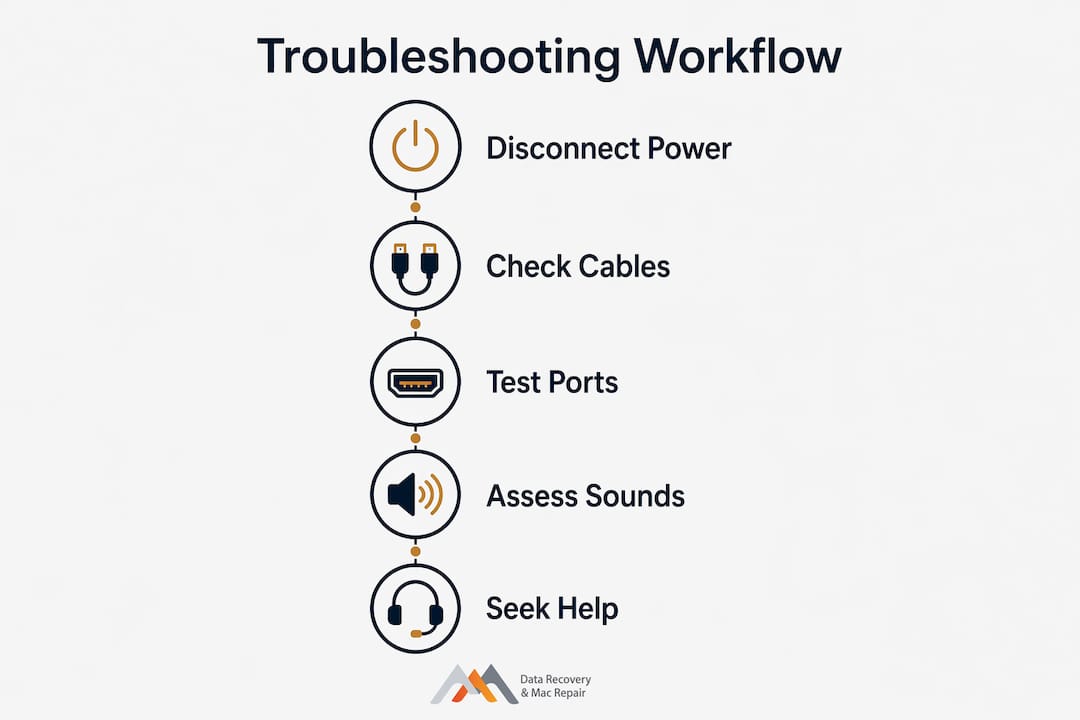
Follow this sequence before attempting any repair or contacting a specialist. Each step is designed to gather information without worsening the drive’s condition.
Disconnect, discharge, and inspect. Unplug the drive from power and USB. Examine the cable for bent pins, fraying, or burn marks. Check the power adapter for the correct voltage rating. Wait 2–5 minutes before reconnecting.
Test with alternative cables, ports, and computers. Use a replacement USB cable rated for data transfer, not just charging. Connect to a rear motherboard USB port on a desktop. Try a second computer entirely to rule out a host-side fault.
Observe sounds and LED behavior on power-up. Listen for the first 10 seconds. A healthy drive spins up smoothly and the LED activates. Any beeping, clicking, or grinding means you stop and do not retry.
Check detection in disk management tools. Open Disk Management on Windows or Disk Utility on macOS. A drive appearing with an “Unknown” or “Not Initialized” label is detected at the hardware level. That is a better sign than no detection at all. Do not click “Initialize” or “Format” under any circumstances.
Consider enclosure or PCB replacement only if you have electronics experience. Swapping the drive’s USB enclosure for a new one costs under $20 and resolves many cases where the bridge board has failed. PCB replacement on the drive itself requires matching firmware chips and is not a beginner task.
The table below summarizes when DIY troubleshooting is appropriate versus when professional recovery is the correct path.
| Symptom | DIY appropriate? | Professional recovery indicated? |
|---|---|---|
| No power, no sound, no LED | Yes, start with cable and port tests | If cable/port tests fail |
| Spinning but not detected | Yes, test enclosure swap | If enclosure swap fails |
| Beeping on power-up | No. Stop immediately | Yes, cleanroom required |
| Clicking or grinding | No. Stop immediately | Yes, head swap likely needed |
| Detected with errors, no noise | Yes, check Disk Management | If data is inaccessible after checks |
Repair enables data access; imaging is sector-by-sector with no writes to the source drive. That distinction matters because a technician’s goal during recovery is never to repair the drive for reuse. The goal is to extract your data safely onto a healthy destination drive.
For a detailed walkthrough specific to WD drives, the WD HDD recovery guide at Macwestlosangeles covers common mechanical and power faults with step-by-step instructions.
Common mistakes that make a bad situation worse
External drives frequently fail due to power issues, corrupted file systems, or hardware damage aggravated by improper handling. The actions people take in the first 10 minutes after a drive stops responding often determine whether the data is recoverable at all.
Avoid these mistakes without exception:
- Running chkdsk, fsck, or any repair utility on the faulty drive. These tools write to the disk. A write operation on a failing drive can overwrite the file system structures needed for recovery.
- Clicking “Initialize Disk” in Disk Management. This action wipes the partition table. Recovery becomes significantly harder and more expensive.
- Repeatedly unplugging and replugging the drive. Each reconnection attempt on a mechanically stressed drive adds wear. Three attempts is a reasonable maximum before stopping.
- Attempting to open the drive enclosure in a non-cleanroom environment. Household air contains particles large enough to score a hard drive platter permanently.
- Reinstalling USB or storage drivers while the drive is connected. Driver changes during an active fault can corrupt the device’s communication state.
Pro Tip: The best insurance against catastrophic data loss is a 3-2-1 backup strategy: three copies of your data, on two different media types, with one copy stored off-site or in cloud storage. An external drive is a backup destination, not a backup strategy by itself.
Same-day professional diagnostics are worth scheduling the moment you recognize that DIY steps have not resolved the issue. The hard drive restoration steps outlined by Macwestlosangeles give Mac users a clear framework for what to expect before and after a professional assessment.
Key Takeaways
An external hard drive that won’t power on requires power isolation first, mechanical symptom assessment second, and professional cleanroom recovery the moment clicking or beeping is detected.
| Point | Details |
|---|---|
| Isolate power first | Test with a known-good cable and rear motherboard USB port before assuming hardware failure. |
| Know the noise warning signs | Beeping or clicking means stop all power attempts immediately to protect platter integrity. |
| DIY limits are real | DIY fixes succeed in 10–20% of mechanical failures; professional recovery is the correct path for physical faults. |
| Never write to a failing drive | Avoid repair utilities, formatting, and initialization on any drive showing failure symptoms. |
| Professional recovery follows repair | Sector-by-sector imaging with no writes to the source drive is the standard for safe data extraction. |
My honest assessment after years of watching drives come through the door
Kaya’s perspective:
The pattern I see most often is this: someone hears a click, panics, and runs chkdsk three times before calling us. By the time the drive arrives at Macwestlosangeles, what was a recoverable head fault has become a scored platter. The data that could have been saved in a cleanroom is now partially or fully gone.
DIY fixes have a low success rate for mechanical failures, and the first 5 minutes of troubleshooting are the most consequential. I am not saying DIY is always wrong. For a power fault, a bad cable, or a failed USB enclosure, self-repair is entirely reasonable and often successful. But the moment you hear a beep or a click, the calculus changes completely.
The uncomfortable truth is that most people overestimate what they can fix and underestimate how quickly a mechanical failure escalates. Technician expertise directly influences recovery outcomes, and cleanroom environments exist for a reason. A drive opened on a kitchen table in Los Angeles air is a drive with a shortened recovery window.
My advice: give yourself two cable swaps and one port change. If the drive does not respond after that, call a professional the same day. The cost of a free diagnostic is zero. The cost of a destroyed platter is everything on it.
— Kaya
When to bring your drive to Macwestlosangeles
Macwestlosangeles has provided professional hard drive data recovery in Los Angeles since 2006, with free diagnostics and a no-recovery, no-charge policy. The team handles firmware faults, logic board component repair, PCB replacement, and full cleanroom mechanical recovery including head swaps for RAID 0, RAID 1, RAID 3, and RAID 5 arrays. Same-day appointments are available at 12041 Wilshire Blvd, Ste 26, centrally located between the 405 and Santa Monica, near UCLA and the Getty Center. Macwestlosangeles serves West LA, Santa Monica, Brentwood, Westwood, Venice, Beverly Hills, Hollywood, and Culver City. Call (310) 866-0828 to speak with a technician today.
FAQ
Why is my external hard drive not turning on at all?
The most common cause is insufficient power from the USB port or a damaged cable. Test with a replacement cable and a rear motherboard USB port before assuming internal hardware failure.
What does it mean when my external drive beeps but won’t spin?
Beeping signals motor or spindle seizure, meaning the drive’s heads are stuck or the motor cannot overcome resistance. Cut power immediately and contact a professional recovery service, as further power attempts risk permanent platter damage.
Can I fix a hard drive not detected in Disk Management myself?
If the drive appears in Device Manager but not Disk Management, an enclosure swap or partition repair may restore access. If the drive does not appear anywhere and makes abnormal sounds, professional cleanroom recovery is required.
How do I know if my data is still recoverable?
Most physical failures leave data intact if the drive is not powered on repeatedly after the fault occurs. The sooner you stop attempting to power the drive and contact a specialist, the higher the probability of full recovery.
What should I never do when my external drive stops working?
Never run chkdsk, fsck, or any repair utility on the failing drive, and never click “Initialize” in Disk Management. Improper software use can worsen the problem and overwrite the file system structures that make recovery possible.