TL;DR:
- Mac Recovery Mode provides a minimal environment for disk repair, macOS reinstallation, and data restoration when the system cannot boot normally. It offers core utilities like Disk Utility, Reinstall macOS, Restore from Time Machine, and Terminal to troubleshoot and recover data, with methods differing between Intel and Apple Silicon Macs. Recovery Mode cannot browse or recover individual files directly; users must stop disk writes immediately and consider professional help for file recovery or complex issues.
Mac Recovery Mode is defined as a built-in, minimalist macOS environment that loads from a hidden partition called macOS Base System, giving you direct access to disk repair, macOS reinstallation, and data restoration tools without booting into the full operating system. The role of Mac Recovery Mode is to serve as your last line of defense when your Mac refuses to start, a disk becomes corrupted, or you need to restore from a Time Machine backup. Understanding how this environment works, which tools it contains, and how it behaves differently across MacBook models and chip generations can mean the difference between a full recovery and permanent data loss.
What are the main utilities in Mac Recovery Mode?
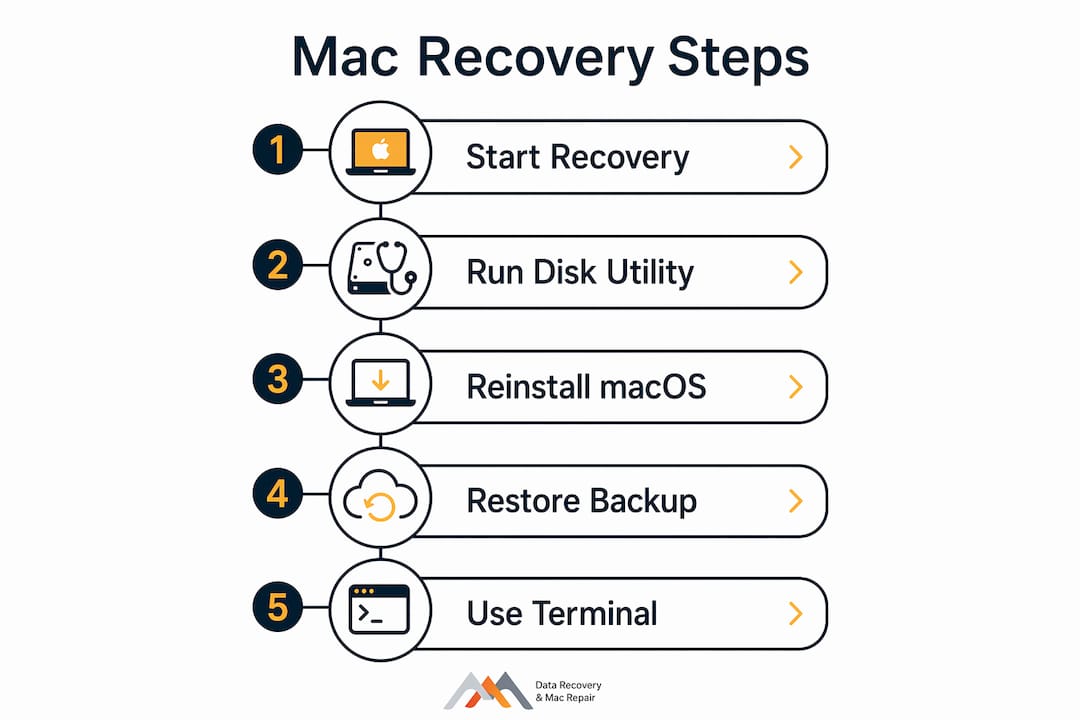
macOS Recovery boots into a small, hidden partition on your startup disk, providing a focused set of repair and restoration utilities. Each tool serves a specific purpose, and knowing which one to reach for first saves time and protects your data.
The four core utilities are:
- Disk Utility. Repairs disk errors, mounts unmounted volumes, and runs First Aid on APFS and HFS+ formatted drives. Use this first when your Mac fails to boot or shows disk-related errors.
- Reinstall macOS. Downloads and installs a fresh copy of macOS from Apple’s servers. This does not erase your data unless you format the drive first.
- Restore from Time Machine. Rolls your system back to a previous backup state. This requires a connected Time Machine backup drive or a Time Capsule.
- Terminal. Provides command-line access for advanced repairs, including disabling System Integrity Protection (SIP), running NVRAM resets, and mounting encrypted FileVault volumes.
The table below shows each utility, its primary function, and the scenario where it applies most directly.
| Utility | Primary function | Best use case |
|---|---|---|
| Disk Utility (First Aid) | Repairs disk errors and volume issues | Mac won’t boot; disk shows errors |
| Reinstall macOS | Installs a clean macOS copy | Corrupted system files; software failures |
| Restore from Time Machine | Restores system from a backup | Accidental deletion; major system failure |
| Terminal | Command-line system access | Advanced repairs; SIP changes; FileVault |
Disk Utility’s First Aid can repair errors on the startup volume that are locked during normal operation. That matters because macOS cannot repair a disk it is actively using, making Recovery Mode the only environment where a full First Aid scan is possible on your primary drive.
How does Mac Recovery Mode differ between Intel and Apple Silicon Macs?
The role of macbook chip generation in recovery is significant. Apple Silicon and Intel Macs use completely different startup sequences, which changes how you access Recovery Mode and what options appear once you are inside it.
Accessing Recovery Mode by chip type
Intel-based Macs:
- Shut down the Mac completely.
- Press the power button, then immediately hold Command + R.
- Release the keys when the Apple logo or a spinning globe appears.
- For Internet Recovery (when the local partition is damaged), hold Command + Option + R instead.
Apple Silicon Macs (M1, M2, M3, M4):
- Shut down the Mac completely.
- Press and hold the power button until you see “Loading startup options.”
- Click Options, then click Continue to enter Recovery Mode.
Apple Silicon Macs access Recovery Mode through a fundamentally different startup architecture, which also unlocks additional security controls not available on Intel hardware. The Startup Security Utility inside Recovery Mode on Apple Silicon lets you set security policies per operating system, a feature Intel Macs do not support at the same granularity.
Internet Recovery loads utilities directly from Apple’s servers when the local recovery partition is corrupted or missing. This is the fallback option for Macs with damaged storage, and it requires a working Wi-Fi or Ethernet connection.
Pro Tip: Before assuming your Mac model uses the Apple Silicon method, confirm the chip by going to Apple menu > About This Mac. M-series chips list “Apple M1” or later; Intel models list a Core i5, i7, or i9 processor. Using the wrong startup key combination will simply boot your Mac normally instead of entering Recovery Mode.
What is the role of Mac Recovery Mode in data recovery?
Recovery Mode supports data recovery indirectly. It is not designed for casual file browsing, and experts warn that its environment restricts normal Finder use entirely. You cannot open folders, preview files, or drag documents to an external drive the way you would in macOS.

Stop all disk writes immediately if you suspect data loss. Physical data remains on the drive until new data overwrites it, which means every write operation after a deletion or crash reduces your recovery window. This applies whether you emptied the Trash, experienced a sudden shutdown, or formatted the wrong volume.
The role of mac trash recovery is often misunderstood. Emptying the Trash removes the file pointer in the directory, but the actual data blocks stay intact on the disk until macOS writes something new to those sectors. On NVMe SSDs with TRIM enabled, however, those blocks can be cleared much faster than on traditional HDDs, which is why speed matters.
Follow these steps before and during any data recovery attempt in Recovery Mode:
- Do not reinstall macOS or erase the disk until you have confirmed your data is backed up or recovered. Both operations overwrite existing data.
- Run Disk Utility First Aid first. Repairing the volume may restore access to files without any data loss risk.
- Connect an external drive before attempting any file transfers or backup restorations.
- Use Terminal cautiously. Incorrect commands can overwrite or corrupt data. Limit Terminal use to read-only diagnostic commands unless you are confident in the syntax.
- Export Recovery Mode diagnostic logs to an external drive. macOS Recovery logs all session actions to a file that technicians can use to diagnose complex failures more accurately.
- Seek professional help before running a macOS reinstall if you are unsure whether your files are safe. A specialist can assess the APFS volume structure and NVMe NAND state before any destructive operation.
Pro Tip: If you need to recover specific files and Recovery Mode’s built-in tools are not enough, some third-party data recovery applications can run from a bootable USB drive while your Mac is in Recovery Mode. This approach avoids writing to the damaged volume entirely.
How to use Recovery Mode for common Mac troubleshooting scenarios
Knowing the right tool for each problem makes Recovery Mode far more effective. The reinstall macOS option does not delete user data unless you erase the disk first, which makes it a safe repair step for corrupted system files.
Running Disk Utility First Aid
- Boot into Recovery Mode using the correct method for your chip type.
- Select Disk Utility from the macOS Utilities window.
- In the left sidebar, select your startup disk (usually named “Macintosh HD”).
- Click First Aid, then click Run.
- If First Aid reports errors it cannot repair, the volume may need reformatting or professional attention.
Reinstalling macOS without data loss
- Boot into Recovery Mode.
- Select Reinstall macOS from the utilities menu.
- Follow the on-screen prompts. Do not select a destination disk that requires erasing.
- The installer downloads the correct macOS version for your hardware from Apple’s servers.
- Your user files, applications, and settings remain intact after the reinstall completes.
Restoring from a Time Machine backup
- Connect your Time Machine backup drive before booting into Recovery Mode.
- Select Restore from Time Machine from the utilities menu.
- Choose the backup source and select the snapshot date you want to restore.
- Allow the restore to complete without interrupting power.
The table below maps common Mac problems to the correct Recovery Mode response.
| Problem | Recovery Mode tool | Expected outcome |
|---|---|---|
| Mac won’t boot past Apple logo | Disk Utility First Aid | Repairs volume errors; restores boot |
| Corrupted macOS system files | Reinstall macOS | Replaces system files; preserves data |
| Accidental file deletion | Time Machine restore | Restores files from last backup |
| Forgotten admin password | Terminal (resetpassword) | Resets password without data loss |
| Recovery partition missing | Internet Recovery | Loads utilities from Apple servers |
For SSD-based Mac recovery, the workflow differs from HDD recovery because APFS snapshots and TRIM behavior affect which files remain accessible. Always check for APFS snapshots in Disk Utility before attempting a full reinstall, as a local snapshot may restore your system faster than a full macOS download. You can also review proven data recovery methods that go beyond what Recovery Mode alone can accomplish.
Key Takeaways
Mac Recovery Mode is the most direct path to repairing a failing Mac, but it requires the right tool, the right sequence, and a clear understanding of what it cannot do for file-level data recovery.
| Point | Details |
|---|---|
| Recovery Mode purpose | It provides disk repair, macOS reinstall, and backup restore without booting full macOS. |
| Chip generation matters | Apple Silicon uses the power button hold; Intel Macs use Command + R at startup. |
| Data recovery limits | Recovery Mode does not browse files; stop disk writes immediately to protect lost data. |
| Correct tool sequence | Run Disk Utility First Aid before attempting any reinstall or erase operation. |
| Diagnostic logs | Export Recovery Mode session logs to an external drive for professional technician review. |
Recovery Mode is powerful, but it has a hard ceiling
I have worked through hundreds of Mac recovery cases since Macwestlosangeles opened in 2006, and the pattern is consistent: users who understand Recovery Mode’s actual scope get better outcomes than those who treat it as a universal fix.
The most common mistake I see is reaching for “Reinstall macOS” before running First Aid. A reinstall feels decisive, but it is unnecessary in most startup failure cases. First Aid resolves a large share of boot problems in under ten minutes, with zero risk to user data. Reinstalling when First Aid would have worked wastes time and adds unnecessary stress to an already failing drive.
The second mistake is assuming Recovery Mode handles file-level data recovery. It does not. If your goal is to retrieve specific documents, photos, or project files from a damaged APFS volume, Recovery Mode is the starting point for assessment, not the finishing tool. The role of experience in data recovery becomes critical at exactly this point. Knowing when to stop and call a specialist prevents the irreversible overwrites that make professional recovery impossible.
Recovery Mode has also grown more capable with Apple Silicon. The per-OS security policies and improved Startup Security Utility give technicians more precise control over what boots and what does not. That is genuinely useful for complex RAID and logic board repair scenarios. But the fundamentals have not changed: back up before you need Recovery Mode, not after.
— Kaya
Macwestlosangeles: professional Mac recovery in Los Angeles
When Recovery Mode reaches its limit, Macwestlosangeles provides the next level of expertise. Serving West LA, Santa Monica, Beverly Hills, Brentwood, Westwood, Venice, Hollywood, and Culver City from 12041 Wilshire Blvd, Ste 26, the team has handled Mac repair and hard drive data recovery since 2006. Free diagnostics and a “no recovery, no charge” policy mean you pay only for results. Same-day appointments are available for urgent cases. The team works across APFS, NVMe, RAID (0, 1, 3, 5), and logic board component repair, covering MacBook, iMac, Mac Mini, and Mac Pro hardware. Call 310-866-0828 to speak with a specialist directly.
FAQ
What is Mac Recovery Mode used for?
Mac Recovery Mode provides access to Disk Utility, macOS reinstallation, Time Machine restore, and Terminal without booting the full operating system. It is the primary environment for repairing startup failures and disk errors on any Mac.
How do I enter Recovery Mode on an Apple Silicon Mac?
Hold the power button at startup until “Loading startup options” appears, then click Options and Continue. This method applies to all M1, M2, M3, and M4 Macs.
Can Recovery Mode recover deleted files?
Recovery Mode does not browse or restore individual files directly. Stop all disk writes immediately after data loss, then use a dedicated data recovery application or contact a professional service before attempting any reinstall or erase.
What is Internet Recovery and when should I use it?
Internet Recovery loads macOS utilities from Apple’s servers when the local recovery partition is corrupted or missing. Trigger it on Intel Macs by holding Command + Option + R at startup, or allow Apple Silicon Macs to fall back to it automatically.
Does reinstalling macOS in Recovery Mode delete my files?
Reinstalling macOS through Recovery Mode does not delete user data unless you erase the disk first. The installer replaces system files only, leaving your documents, applications, and settings intact.