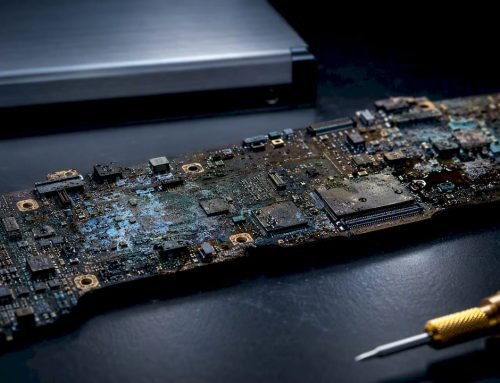
Stop all disk writes immediately. If your M1, M2, M3, or M4 Mac can still reach macOS Recovery or Share Disk, use those built-in tools first to copy files off before anything else touches the drive. If the Mac won’t boot to Recovery, or you don’t know the FileVault password or recovery key, put it down and call a lab experienced specifically with Apple Silicon board-level work, because guessing from here usually costs more data than it saves.
TL;DR:
- Recovering data on Apple Silicon Macs requires acting quickly since additional writes can overwrite critical metadata and decrease recovery chances.
- If the Mac cannot boot or the drive is not visible, referencing Recovery mode to use Disk Utility or Share Disk over the network offers the safest recovery methods.
- Encryption tied to the Secure Enclave means that without the FileVault password or recovery key, the data is effectively unrecoverable, especially if the Secure Enclave fails or the storage is soldered.
- DIY data recovery is only feasible if the drive mounts in Recovery Mode, but attempting repeated scans on failing NAND chips can cause irreversible damage.
- Engaging a professional lab is essential if the Mac shows hardware failure, won’t reach Recovery, or the storage is not detectable, as repair involves specialized micro-soldering and forensic imaging that preserve encryption integrity.
Table of Contents
- Apple Silicon Data Recovery: The First Moves That Actually Matter
- Why Apple Silicon Changed Recoverability: Secure Enclave, Soldered NVMe, and FileVault
- When to Call a Professional for Apple Silicon Recovery
- Preventing the Next Apple Silicon Data Loss
- A Technician’s View on Realistic Recovery Expectations
- Talk to a Local Lab Before You Risk Another Boot Cycle
- Sources
- FAQ
Apple Silicon Data Recovery: The First Moves That Actually Matter
Every additional write to a failing drive risks overwriting the metadata that points to your deleted or inaccessible files. That’s true on any computer, but it’s especially unforgiving on Apple Silicon Macs, where the file system (APFS) packs metadata and data closer together than older HFS+ volumes did. The clock matters more than people expect.
Here’s the safe sequence to follow, in order:
- Stop using the Mac. Don’t save new files, don’t run updates, don’t reboot into the normal OS if you can avoid it.
- Boot into macOS Recovery. On any Apple Silicon Mac, hold the power button until “Loading startup options” appears, then choose Options. This works differently than the Intel-era Command+R shortcut.
- Try Disk Utility first. From the Recovery menu, Disk Utility can tell you whether the drive is even mounting and whether it’s a logical problem (missing files, corrupted directory) or a hardware one (drive not visible at all).
- Check Time Machine System Restore. If you have a recent backup, restoring through Recovery is far safer than trying to extract files one by one from a struggling disk.
- Use Share Disk if the drive is visible but the OS won’t launch. From the Recovery utility window, choose Share Disk Over the Network, or connect a Thunderbolt cable to a second Mac. This exposes the internal volume so the healthy Mac can copy files directly, and it’s one of the multiple non-destructive recovery paths Apple documents for Apple Silicon systems before anyone reaches for more invasive options.
- Unlock the encrypted volume if you have the credentials. Share Disk will prompt for the FileVault password. Without it, the volume stays sealed no matter which Mac is doing the copying.
If the drive can still start up, Apple’s own recovery documentation recommends exhausting Disk Utility and Time Machine restore before anything more aggressive.
Third-party recovery software has a place, but only under narrow conditions. It helps when macOS can actually see and mount the drive, letting you run a read-only scan to pull back deleted files. It does not help, and can actively make things worse, when the SSD isn’t mounting at all. Running repeated write-heavy scans on a drive with failing NAND cells is one of the fastest ways to turn a recoverable problem into a permanent one.
Pro Tip: Before you try anything else, take a photo or write down every symptom, error message, and beep or chime pattern you noticed. A lab diagnosing your Mac will ask, and precise details shave real time off the process.
Why Apple Silicon Changed Recoverability: Secure Enclave, Soldered NVMe, and FileVault
Apple Silicon Macs encrypt storage by default, whether or not you ever turned on FileVault. The Secure Enclave, a dedicated security chip built into the processor package, generates and holds the hardware keys that unlock your data, and those keys never leave the chip. Turning on FileVault adds a second layer tied to your password or a 24-character recovery key. Losing both the password and the recovery key on a Mac with a damaged Secure Enclave creates a scenario that’s close to unsolvable.
That encryption model changes the physics of recovery work:
- Storage is soldered directly to the logic board on Apple Silicon Macs, so there’s no separate SSD to pull and mount in another machine the way you could with older MacBooks.
- Chip-off extraction, a technique that sometimes worked on traditional drives, generally fails here. Even if a technician physically reads the NAND chips, the result is unreadable ciphertext without the original Secure Enclave’s keys.
- The processor and Secure Enclave have to survive for almost any recovery path to work, because the decryption keys are bound to that specific chip.
| Failure Type | Recovery Outlook |
|---|---|
| Accidentally deleted files, drive still mounts | Usually recoverable with Recovery-mode tools or software scans |
| Logic board fault, Mac reaches Recovery/Share Disk | Often recoverable; copy data out before repair |
| SSD not visible, board otherwise intact | Sometimes recoverable through board-level repair |
| Dead Secure Enclave, no password or recovery key | Rarely recoverable under any method |
The practical takeaway: if your Mac still boots to Recovery, act now using the steps above. If it doesn’t, and you’re missing your FileVault credentials, your options narrow to specialized board-level work, and even that depends on the Secure Enclave still functioning.
When to Call a Professional for Apple Silicon Recovery
Stop the DIY steps and call a lab once any of these apply:
- The Mac won’t power on, chimes abnormally, or shows visible liquid or physical damage.
- It won’t reach macOS Recovery or Share Disk no matter what startup combination you try.
- Disk Utility shows the SSD as invisible or “not mountable,” not just a corrupted volume.
- You don’t have the FileVault password and the recovery key isn’t stored anywhere accessible.
A specialist lab’s workflow generally runs through a few stages. Diagnostics come first, isolating whether the fault is the storage controller, the power delivery system, or a separate logic board component. From there, board-level repair and precision micro-soldering aim to restore a stable power path so the Mac can attempt a controlled boot. Where a full boot isn’t realistic, some labs pursue forensic imaging while working around encryption barriers, rather than attempting a full restore that could disturb fragile hardware. Live imaging over a full restore also helps preserve original file metadata when a controlled boot succeeds, according to practitioner accounts of Apple Silicon lab work.
Success still hinges on the Secure Enclave and processor surviving, and on you having usable credentials. Before you call, gather your Apple ID, your FileVault recovery key if you have it, any recent backup you’re aware of, and a clear description of what happened and when. That single conversation often determines whether a diagnostic takes twenty minutes or two hours. Ask any provider for a written estimate before work begins, and confirm upfront whether they operate on a “no recovery, no charge” basis, since that policy shifts the financial risk away from you if the attempt doesn’t succeed.
Preventing the Next Apple Silicon Data Loss
Most emergency calls trace back to a backup habit that slipped. A short list of fixes now saves a much longer conversation later.
- Keep Time Machine running continuously, and actually test a restore every few months, not just the backup itself.
- Add a cloud backup for irreplaceable files (photos, financial records, active projects) so a single hardware failure never becomes a total loss.
- Store your FileVault recovery key somewhere retrievable, such as iCloud escrow, which Apple’s own security guidance recommends, rather than only on a sticky note near the Mac itself.
- Keep liquids away from the keyboard deck, since logic board damage on soldered storage is far harder to work around than on machines with removable drives.
- Consider RAID or a second redundant drive for business-critical files where downtime has a real dollar cost.
Pro Tip: Set a recurring 15-minute calendar reminder every quarter to verify your Time Machine backup actually completed and that you can locate your FileVault recovery key. Most people who lose both do so quietly, months apart.
A Technician’s View on Realistic Recovery Expectations
Since 2006, the pattern hasn’t changed much: the Macs that come back with the best outcomes are the ones where nobody kept using them after something went wrong. Board-level repair and microsoldering can do real work on a damaged Apple Silicon Mac, but success still depends on the Secure Enclave and processor surviving, so any promise of guaranteed recovery on a dead board deserves skepticism. Stop the writes, save your credentials, and let diagnostics tell you what’s actually possible before you spend a dollar.
— Kaya
Talk to a Local Lab Before You Risk Another Boot Cycle
A specialized local lab has handled Apple Silicon board-level recovery and logic board component repair since 2006, working directly with the encryption and soldered NVMe constraints outlined above instead of relying on generic chip-off methods that don’t work on M1 and later Macs. Every case starts with free diagnostics, and the practice runs on a no recovery, no charge basis, so you’re not paying for an attempt that doesn’t pan out.
Call 310-866-0828 to get a same-day appointment, and bring your Apple ID, FileVault recovery key if you have it, and a description of the symptoms so the lab can start diagnostics immediately. The shop sits at 12041 Wilshire Blvd, Ste 26, between the 405 and Santa Monica Boulevard near UCLA and the Getty Center, serving West LA, Santa Monica, Beverly Hills, Brentwood, Westwood, Venice, Hollywood, and Culver City.

Start with the Mac data recovery services overview for the full range of what’s handled in-house, and check the SSD recovery workflow walkthrough if you want a closer look at what happens once your Mac is on the bench.
Sources
- Recover files from a sick Mac – The Eclectic Light Company
- Data recovery is now possible from Apple Silicon systems – AppleInsider
- Apple T2 & Apple Silicon Encryption: What It Means for Data Recovery – Desert Data Recovery
FAQ
How do I boot my Apple Silicon Mac into Recovery mode?
Hold the power button down until “Loading startup options” appears on screen, then click Options and select your startup disk. This replaces the old Command+R shortcut used on Intel Macs and gives you access to Disk Utility, Time Machine System Restore, and Share Disk.
How much does data recovery cost for a Mac or iPhone?
Cost depends entirely on whether the issue is logical (a deleted file, a corrupted volume) or physical (a failed logic board component), so there’s no single flat rate across devices. Macwestlosangeles offers free diagnostics and quotes work on a no recovery, no charge basis, with current pricing available directly through the data recovery services page.
Can I recover data from my MacBook myself?
Yes, if the Mac can still reach macOS Recovery or Share Disk, you can copy files out yourself using Disk Utility or a Thunderbolt connection to a second Mac. If the drive isn’t mounting or you’re missing your FileVault password and recovery key, DIY attempts risk permanent data loss and a professional lab is the safer route.
Does Apple’s own recovery process actually work?
Apple’s built-in Recovery tools work reliably for logical issues like accidental deletion, corrupted directories, or a failed macOS update, since they rely on non-destructive utilities rather than invasive extraction. They don’t help when the storage itself is physically damaged or when the Secure Enclave that holds your encryption keys has failed, which is where board-level repair from a specialist becomes necessary.
Why can’t a technician just remove the SSD and read it directly?
Apple Silicon Macs solder NVMe storage directly to the logic board, so there’s no drive to remove and mount elsewhere. Even in cases where a chip could be physically read, the data comes back as unreadable ciphertext because the decryption keys are sealed inside the Secure Enclave on the original processor.