TL;DR:
- The SSD in a Mac fundamentally influences system speed, affecting boot times, app launches, and data transfers.
- Proper maintenance, including keeping sufficient free space and monitoring total data writes, extends SSD lifespan and performance.
The role of SSD in Mac computers goes far beyond simple storage. Most users assume an SSD is just a faster hard drive, but that framing misses how deeply the solid-state drive shapes every interaction with your Mac, from the moment you press the power button to how macOS manages memory, caches, and virtual storage in the background. Understanding what your SSD actually does explains why a Mac with 256GB of storage can feel sluggish over time, why RAM sizing matters more than most people realize, and what steps genuinely protect your data over the long haul.
Table of Contents
- Key takeaways
- The role of SSD in Mac hardware
- How SSD shapes Mac performance
- SSD lifespan and maintenance
- How storage capacity affects daily use
- Protecting your Mac’s SSD and knowing when to get help
- My take on SSD wear and what most users get wrong
- SSD repair and data recovery in West LA
- FAQ
Key takeaways
| Point | Details |
|---|---|
| SSDs define Mac speed | Boot times, app launches, and file transfers all depend directly on SSD read/write performance. |
| System Data consumes space fast | macOS AI features and caches can push System Data past 100GB, especially on smaller SSDs. |
| SSD lifespan is finite | Erase-write cycles limit SSD life; keeping 10-25% free space and maximizing RAM extends it. |
| Soldered SSDs require professionals | Most modern Macs have soldered, non-upgradable SSDs, making data recovery a specialist task. |
| Backups prevent permanent loss | Regular Time Machine or cloud backups are the single most effective protection against SSD failure. |
The role of SSD in Mac hardware
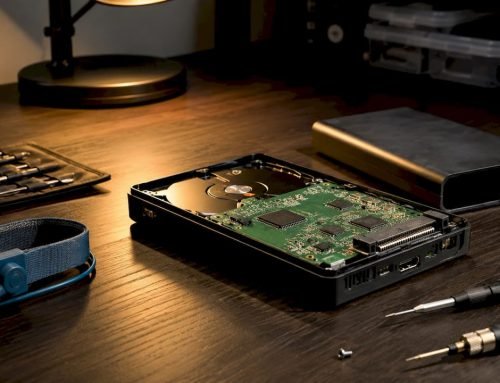
A solid-state drive stores data on NAND flash memory chips rather than on spinning magnetic platters. There are no read/write heads, no mechanical arms, and no rotational delays. Data is accessed electronically, which is why SSD access times are measured in microseconds rather than the milliseconds typical of traditional hard disk drives.
Inside a Mac, the SSD consists of several key components: the NAND flash cells where data physically lives, a controller chip that manages read/write operations and error correction, and firmware that handles wear leveling. Wear leveling distributes write cycles evenly across all cells so no single region wears out prematurely. Apple’s NVMe-based SSDs communicate directly with the processor over a high-speed bus, bypassing the slower SATA interface that older HDDs relied on.
macOS reinforces this architecture with the Apple File System (APFS). APFS was designed specifically for flash storage, with features like space sharing, snapshots, and cloning that take advantage of how SSDs read and write data at a block level. When you duplicate a large file on an APFS volume, the operation completes almost instantly because the system creates metadata pointers rather than physically copying every byte. That kind of efficiency only works because the underlying storage is an SSD.
Here is how SSDs compare to HDDs across the dimensions that matter most to Mac users:
- Speed: SSDs outperform HDDs by up to 100x in access times, enabling macOS to boot in seconds and apps to open nearly instantly.
- Durability: No moving parts means SSDs resist shock, drops, and vibration far better than HDDs, which are vulnerable to physical damage from even minor impacts.
- Power and heat: SSDs draw less power and generate less heat, contributing to longer battery life on MacBooks and quieter operation on all Mac models.
- Noise: SSDs operate silently because there is nothing spinning or seeking. An HDD generates audible clicks during normal operation.
- Form factor: NVMe SSDs are compact enough to be soldered directly onto Apple Silicon logic boards, enabling the thin and lightweight designs of modern Macs.
How SSD shapes Mac performance
Every macOS operation that touches storage runs through the SSD. Boot time is the most visible example: a Mac with an NVMe SSD typically boots in under 15 seconds, while an equivalent machine with a traditional HDD would take a minute or more. App launch times follow the same pattern. Final Cut Pro, Xcode, and Adobe Photoshop all load noticeably faster because the SSD delivers large sequential reads without the seek-time penalty of a spinning disk.

Beyond launches, the SSD supports macOS virtual memory. When your Mac runs low on RAM, macOS writes compressed memory pages to the SSD as swap files. Because SSD speeds are orders of magnitude faster than HDD speeds, this swap behavior is mostly invisible on a well-configured Mac. On a machine with limited RAM, however, the system writes swap constantly, which both slows performance and wears the drive.
The file system also depends on SSD speed for background tasks. Spotlight indexing, Time Machine local snapshots, iCloud sync, and FileVault encryption all run concurrently with your active work. On an SSD, these processes consume minimal perceivable performance. On an HDD, they cause the system to stall.
Pro Tip: Keep at least 15-20% of your SSD capacity free at all times. macOS uses available space for swap files, APFS snapshots, and system caches. When free space drops below 10%, the system is forced to aggressively manage these operations, which noticeably degrades responsiveness.
System Data on macOS can grow past 100GB on 256GB configurations due to background AI model caches, local Time Machine snapshots, and accumulated app data. That growth directly compresses the free space your SSD needs to function efficiently.
SSD lifespan and maintenance
SSDs are durable but not immortal. Each NAND cell can only be erased and rewritten a finite number of times. A typical SSD may fail after approximately 3,000 erase-write cycles, or when total data written reaches roughly 3,000 times its raw capacity. For everyday Mac use, that translates to an estimated lifespan of around 10 years, though workloads that generate heavy swap usage or constant large file writes will accelerate wear.
The single most effective way to extend your Mac’s SSD life is to maximize RAM. When macOS does not need to write swap files, the SSD accumulates far fewer write cycles over its lifetime.
Wear leveling handles the distribution problem automatically, but it needs room to operate. Keeping 10-25% free space gives the controller enough unallocated blocks to redistribute writes effectively. A drive that is 95% full forces the controller to constantly erase and rewrite the same cells, accelerating degradation.
Practical steps to protect your SSD and monitor its health:
- Monitor total bytes written: Tools like DriveDx report cumulative write statistics. Watching this number over time gives you an early warning when a drive approaches its rated endurance.
- Maximize RAM: RAM prioritization reduces swap file writes significantly, which is especially critical as macOS AI-driven features increase memory footprint with each release.
- Use a UPS: Power filtering via a UPS protects against electrical surges and dirty power that can corrupt SSD firmware or damage NAND cells.
- Maintain regular backups: Time Machine, Carbon Copy Cloner, or a reliable cloud service should run on a schedule. SSD failure can be sudden and complete, with no warning signs.
- Avoid extreme heat: Sustained high temperatures accelerate NAND degradation. Keep your Mac’s vents clear and consider a stand that improves airflow.
If you suspect your SSD is failing, stop all disk writes immediately. Continued writes increase the chance that data in partially failed cells becomes permanently unrecoverable.
How storage capacity affects daily use
Choosing the right SSD size at purchase is one of the most consequential decisions a Mac buyer makes. Unlike RAM, which is also soldered in modern Apple Silicon Macs, the SSD cannot be upgraded after purchase on most current models. The capacity you select on day one is the capacity you live with.
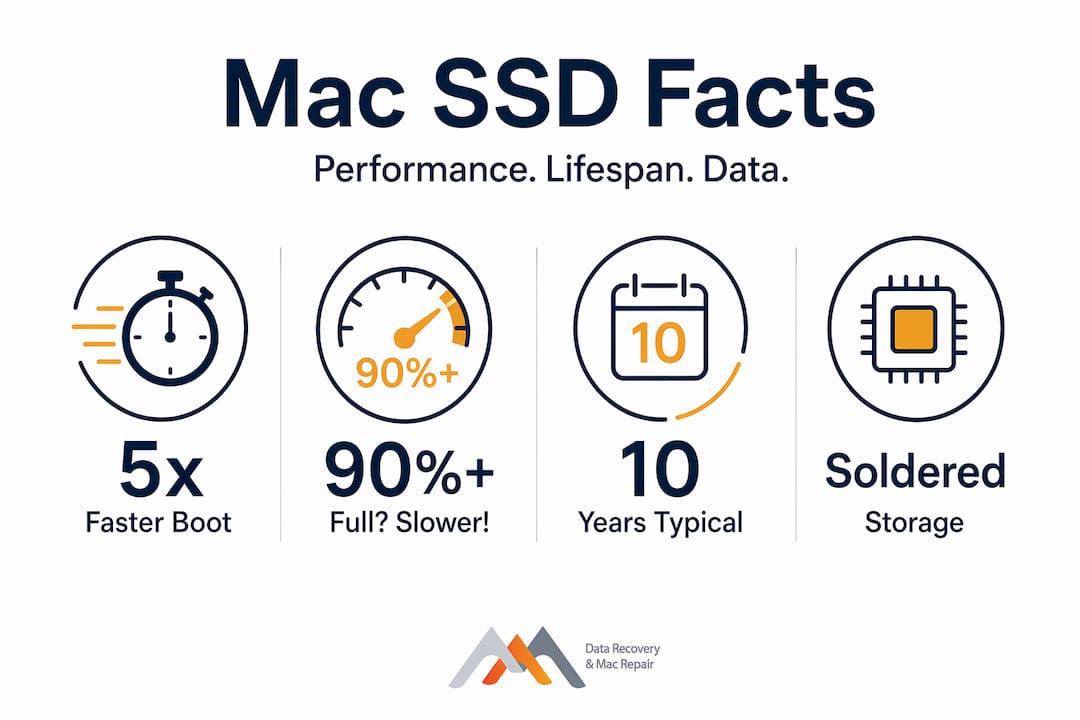
The challenge is that macOS consumes more of that space than most users anticipate. Growing system data and AI features in macOS push storage demands higher with every major release. A 256GB Mac that felt spacious when new can feel constrained within two or three years.
Here is a practical breakdown of recommended configurations based on workload:
- 256GB: Suitable only for light use with strict discipline around file management. iCloud offloading is often required to keep the drive healthy.
- 512GB: A practical baseline for most users, providing enough room for system data, apps, and a moderate media library.
- 1TB: Recommended for users who work with video, audio production, large photo libraries, or virtual machines.
- 2TB and above: Appropriate for professional workflows involving 4K/8K video editing, large Xcode builds, or running multiple development environments.
External SSDs can expand available storage effectively, but they introduce workflow friction for files that need fast, consistent access. A Thunderbolt-connected external SSD can approach internal drive speeds for media editing, but it adds a cable dependency and is not a substitute for adequate internal capacity for your operating system and active project files.
| Workload | Recommended internal SSD | Priority: RAM vs. storage |
|---|---|---|
| Web browsing, documents | 256GB or 512GB | Either is acceptable |
| Photo editing (RAW files) | 512GB to 1TB | Both matter equally |
| Video production (4K/8K) | 1TB to 2TB | Storage first, then RAM |
| Software development | 512GB to 1TB | RAM first, then storage |
| Music production / DAW | 512GB to 1TB | RAM first, then storage |
For professional users especially, RAM is more critical than raw storage size because insufficient RAM causes constant swap writes that erode both performance and SSD longevity simultaneously.
Protecting your Mac’s SSD and knowing when to get help
Most modern MacBooks, iMac models, and Mac Minis have SSDs that are soldered directly to the logic board. This architecture delivers performance advantages but means there is no user-serviceable SSD replacement path. When a soldered SSD begins to fail, data recovery requires specialized equipment and clean-room capable technicians.
Steps you can take proactively to protect your investment:
- Schedule regular maintenance checks, including SMART status verification and system data cleanup, at least twice a year.
- Use Time Machine with a dedicated external drive and verify that backups are completing successfully, not just running.
- Avoid storing your only copy of critical files solely on your Mac’s internal SSD.
- Watch for early warning signs: kernel panics, unexpected restarts, files that fail to open, or a drive that no longer mounts.
Pro Tip: If your Mac becomes unresponsive and you suspect storage failure, do not attempt a forced restart repeatedly. Each restart cycle on a degrading SSD can overwrite recoverable data. Power off, leave the machine alone, and contact a professional immediately.
For users in West LA, same-day appointments with specialists who handle SSD data recovery and logic board repair can mean the difference between full data restoration and permanent loss. The combination of proper backups, good storage hygiene, and access to expert local repair covers virtually every SSD failure scenario a Mac user is likely to encounter.
My take on SSD wear and what most users get wrong
I’ve seen hundreds of Macs come through the shop with the same underlying problem: users who chose the smallest available SSD to save money at purchase and then ran the drive at 90-95% capacity for three years straight. The wear pattern is completely predictable. When the controller has almost no free blocks to work with, wear leveling breaks down, and the drive degrades far faster than it should.
What I’ve found actually matters is the RAM decision. Most people agonize over storage capacity but under-spec their memory. A Mac with 16GB of unified memory and a 512GB SSD will outperform and outlast a Mac with 8GB of RAM and a 1TB SSD in almost any real-world professional workflow. The swap file writes from 8GB RAM configurations are relentless, especially now that macOS AI features are pushing memory footprints higher with every update.
The environmental factors surprise people too. I’ve worked on Macs that lived on desks next to windows in Los Angeles, running hot all summer with no airflow. Heat is a genuine accelerant for NAND degradation. A simple laptop stand with airflow clearance and a UPS for desktop Macs are inexpensive protections that most users completely overlook.
My advice is direct: if your Mac is showing any storage irregularities, stop writing to the drive. Do not try to back up by copying files through Finder on a suspect drive. That approach often accelerates cell failure. Get a professional to image the drive at the sector level first, then recover from the image. That is the only way to maximize recovery odds.
— Kaya
SSD repair and data recovery in West LA
When your Mac’s SSD shows signs of failure, or when data has already been lost, the response time and technical capability of your recovery partner determine the outcome. Macwestlosangeles has provided Mac SSD data recovery and hardware repair services from its Wilshire Boulevard location in West LA since 2006, serving clients across Brentwood, Santa Monica, Beverly Hills, Westwood, and Culver City. The team handles logic board component repair, soldered SSD recovery, FileVault-encrypted drive restoration, and RAID configurations including RAID 0, 1, 3, and 5. Free diagnostics and a no-recovery, no-charge policy mean you understand exactly what is recoverable before committing to any service. Same-day appointments are available for urgent situations. Call (310) 866-0828 to speak with a technician directly, or visit the office at 12041 Wilshire Blvd, Suite 26, near UCLA and the Getty Center.
FAQ
What does the SSD do in a Mac?
The SSD serves as the primary storage device and directly supports macOS performance through fast data access, virtual memory (swap), system caches, and the APFS file system. Every boot, app launch, and file operation runs through the SSD.
How long does a Mac SSD typically last?
A Mac SSD can last approximately 10 years under typical use, but lifespan shortens with heavy swap file activity and low free space. Monitoring total bytes written with tools like DriveDx provides an early warning of approaching endurance limits.
Can you upgrade the SSD in a modern Mac?
Most Apple Silicon Macs have SSDs soldered directly to the logic board and cannot be upgraded after purchase. This makes the original storage configuration permanent, which is why selecting adequate capacity at the time of purchase matters so much.
How does SSD capacity affect Mac performance?
Running an SSD at more than 85-90% capacity impairs wear leveling and forces the controller to reuse the same cells repeatedly, accelerating degradation and slowing read/write speeds. Keeping at least 10-25% free space maintains optimal performance.
When should I contact a professional about my Mac’s SSD?
Contact a specialist immediately if you see kernel panics, files that refuse to open, a drive that fails to mount, or any signs of physical damage. Stop all disk writes first to preserve recoverable data, then reach out to a qualified Mac repair service for diagnostics before attempting any self-recovery steps.