Stop all disk writes immediately, then try Apple’s built-in Repair Library tool by quitting Photos and relaunching it while holding Command and Option. That single step resolves most database-level corruption without touching your original image files. If the repair fails, follow the escalation checklist below before you try anything else, and if a drive is making noise or physical damage is suspected, stop and call a professional data-recovery service instead of continuing on your own.
TL;DR:
- The Repair Library tool analyzes and corrects database inconsistencies but cannot repair damaged image files or physical drive issues.
- Repair attempts should be preceded by a full backup and followed by testing with a different library or running disk First Aid to rule out filesystem errors.
- Copying the Masters or Originals folder in small chunks can help identify specific corrupted images causing the library failure.
- Persistent errors, unusual drive noises, or physical damage signal the need for professional data recovery services rather than further DIY attempts.
- Proper sequencing—back up first, then repair, and escalate after hardware signs—prevents further data loss during corruption recovery.
Table of Contents
- How Do You Fix a Corrupted Photos Library?
- What To Do When Repair Library Doesn’t Work
- Recovering Images When the Library Won’t Open at All
- When Should You Call a Professional Data Recovery Service?
- How Do You Prevent Photos Library Corruption?
- What Mac Repair Technicians Actually Know About This Problem
- Get Local Help From Macwest Data Recovery
- Sources
- FAQ
How Do You Fix a Corrupted Photos Library?
Apple built a dedicated tool for exactly this situation, and it’s the correct first move for almost every case of Photos library corruption. Quit Photos completely, then hold down Command and Option while relaunching the app. A window titled “Repair Library” appears and offers to rebuild your library’s internal database.
Before you click anything, back it up. Copy the entire .photoslibrary package to an external drive, or confirm your most recent Time Machine backup completed successfully. Repair operations rewrite database structures, and if something goes wrong mid-process, you want an untouched copy sitting elsewhere.
Once you’re backed up, here’s the actual repair sequence:
- Quit Photos entirely (Command+Q, not just closing the window).
- Relaunch Photos while holding Command+Option until the Repair Library prompt appears.
- Authenticate with your Mac’s admin password when asked.
- Click Repair, then wait. A library with a few thousand images might take minutes; a library with 100,000+ photos and videos can take considerably longer.
- Let it finish uninterrupted. Don’t put the Mac to sleep or force-quit during the process.
What’s actually happening under the hood: the Repair Library tool analyzes the library’s database and corrects inconsistencies in how Photos tracks and indexes your images. It doesn’t repair damaged JPEG or HEIC files themselves. It fixes the index that tells Photos where to find them and how they relate to albums, faces, and metadata.
Most users see one of three outcomes: Photos opens normally afterward, Photos opens but some images show as missing thumbnails, or the repair fails outright with an error. Each outcome points to a different next step, which is where the escalation checklist comes in.
What To Do When Repair Library Doesn’t Work
A failed repair almost always means the problem sits below the database layer, in the filesystem or the drive itself. Work through these steps in order rather than jumping around.
- Test with a different library. Hold Option while launching Photos, then create or switch to a blank library. If Photos opens fine, the app isn’t the problem. Your original library is.
- Run Disk Utility First Aid on the volume holding your library. Open Disk Utility, select the drive, and click First Aid. This catches file-system errors that block Photos from reading the library correctly, even when the Photos database itself is intact.
- Move external libraries to internal storage. If your library lives on an external SSD or hard drive, copy it to your Mac’s internal drive and retry the repair there. Check Get Info on the external volume for “Ignore ownership,” and confirm the drive is formatted as APFS or HFS+, not exFAT or FAT32, which Photos handles poorly for active libraries.
- Reboot into Safe Mode. Hold the power button until startup options appear, choose your main volume, then hold Shift. Safe Mode disables non-essential extensions and can clear conflicts that block repair.
- Check for pending macOS updates. If corruption started right after a system update, or right before one was due, an unpatched OS bug could be the actual cause.
Pro Tip: If Disk Utility’s First Aid reports an error it can’t repair, stop there. That’s usually your signal that the volume has real structural damage, not just a Photos-specific glitch, and forcing more repair attempts can make data recovery harder later.
Recovering Images When the Library Won’t Open at All
When Repair Library fails and Disk Utility comes back clean, the corruption often lives inside specific image files rather than the database shell around them. This is where a practitioner technique borrowed from data-recovery work comes in handy.
Right-click your .photoslibrary file and choose “Show Package Contents.” Inside, locate the Masters or Originals folder, which holds your actual photo and video files organized by import date. Instead of copying the whole folder at once, copy it in smaller date-range chunks to a separate external drive. When a copy operation stalls or throws an error on a specific subfolder, that failure pinpoints the corrupted file causing the whole library to choke.
Once you’ve isolated the bad subfolder, skip it and finish copying everything else. Create a brand-new Photos library and reimport the recovered files. Before doing any of this, though, clone the source drive or create a disk image if you can. Every additional write to a struggling drive raises the odds of losing something for good.
| Recovery Stage | What It Reveals |
|---|---|
| Whole-library copy fails immediately | Likely a filesystem or permission issue, not file corruption |
| Copy succeeds on most Masters subfolders | Corruption is isolated to specific image files |
| Copy fails on same subfolder repeatedly | That subfolder contains the damaged file(s) |
| Reimport works, but metadata/albums are gone | Database was the casualty, not the images themselves |
When Should You Call a Professional Data Recovery Service?
Certain signals mean you’ve crossed from a software fix into hardware territory, and continuing on your own risks turning a recoverable situation into a permanent loss.
- The Repair Library tool errors out repeatedly, even after Disk Utility First Aid finds nothing wrong.
- Copying the Masters folder fails across multiple attempts, not just on one subfolder.
- The drive makes clicking, grinding, or whirring noises you haven’t heard before.
- The Mac or external drive suffered a drop, liquid exposure, or other physical impact.
- You’re dealing with a RAID array, NVMe SSD, or any storage setup beyond a single external hard drive.
Professional labs approach this differently than a home fix. Recovery specialists work from a forensic image of the drive rather than the drive itself, which means stopping writes and imaging the media preserves every recovery option before any repair attempt begins. For hardware failure, that can mean logic board component repair, RAID 0/1/5 reconstruction across multiple failed drives, or specialized handling of NVMe SSD controllers that don’t respond to standard consumer tools.
Macwest Data Recovery has handled Mac hardware and data recovery cases since 2006, and offers Free Diagnostics with a no recovery, no charge policy, so you’re not paying to find out your drive is unrecoverable. If your Photos library sits on a drive showing any of the warning signs above, stop working on it and call 310-866-0828 for a same-day appointment. You can also review what Mac photo recovery actually involves before you call.
How Do You Prevent Photos Library Corruption?
Most corrupted libraries trace back to a handful of preventable habits, and interrupted writes from power loss or unsafe drive ejection top the list, alongside outright drive hardware failures and iCloud Photos sync interruptions.
- Run Time Machine continuously and pair it with at least one offsite or cloud backup, so a single point of failure never costs you the whole library.
- Verify your backups occasionally by actually opening a recent Time Machine snapshot, rather than assuming the backup completed correctly.
- Format any external drive holding an active Photos library as APFS, and avoid exFAT, which lacks the journaling that protects against corruption during unexpected disconnects.
- Always eject external drives properly through Finder before unplugging them, and keep macOS updated so filesystem bug fixes reach your Mac promptly.
- Export archival copies of your library periodically, and treat a successful Repair Library run as a good moment to confirm image counts still match what you expect.
What Mac Repair Technicians Actually Know About This Problem
Most guides treat Photos corruption as a single event with a single fix. It isn’t. The database layer and the file layer fail for completely different reasons, and conflating them is why so many people run Repair Library three or four times expecting a different result.
The conventional advice oversells the repair tool’s reach. It’s genuinely good at what it does, fixing database inconsistencies, but it has zero ability to touch a damaged JPEG or a failing drive controller. Treating a hardware problem as a software problem is how people lose photos permanently: they keep retrying repair on a dying drive, and every attempt is another write cycle pushing that drive closer to failure.
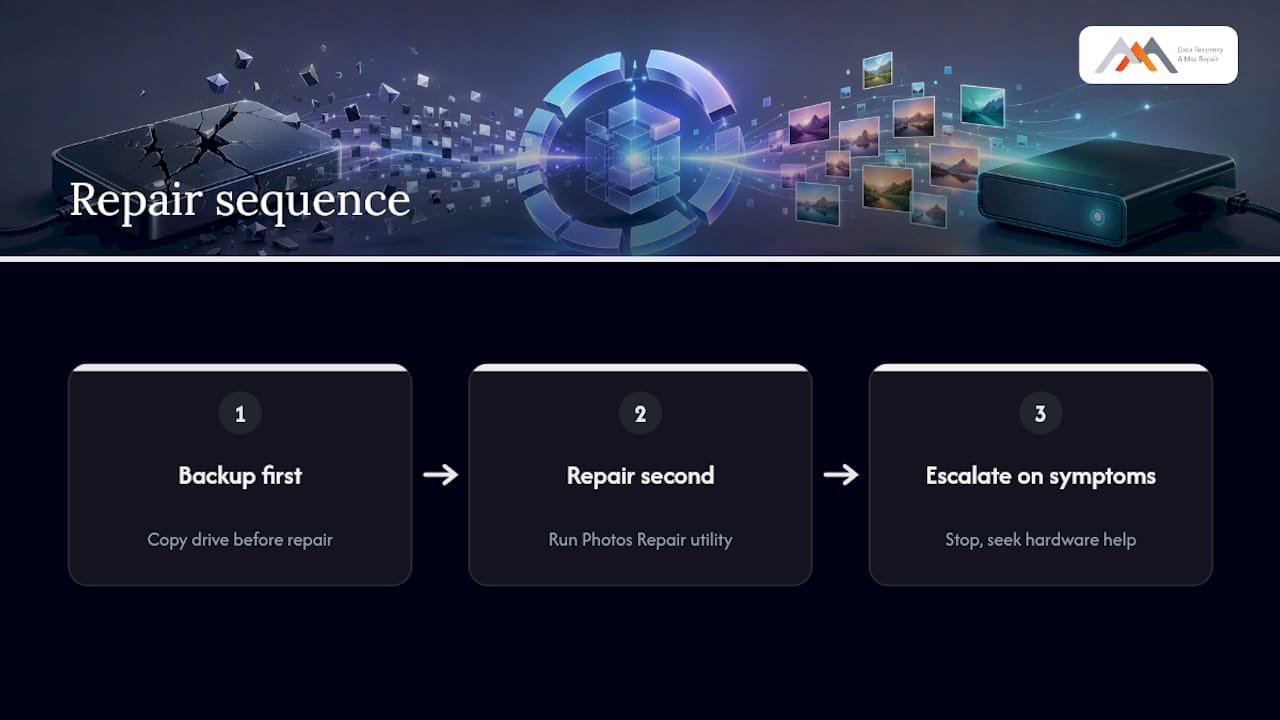
If there’s one priority worth acting on immediately, it’s sequencing. Back up first, repair second, escalate the moment a drive shows any physical symptom. Most people do this backward: they repair first, panic when it fails, and only think about backup after the damage is already done. Get the order right, and a corrupted library is usually a inconvenience. Get it backward, and it can become a real loss.
— Kaya
Get Local Help From Macwest Data Recovery
When a Photos library won’t repair and you suspect the problem sits deeper than software, Macwest Data Recovery gives West LA, Santa Monica, and Beverly Hills residents a faster path than mailing a drive to some out-of-state lab and waiting weeks for updates. Centrally located at 12041 Wilshire Blvd, Ste 26, between the 405 and Santa Monica near UCLA and the Getty Center, Macwestlosangeles also serves Brentwood, Westwood, Venice, Hollywood, and Culver City with same-day appointments for urgent cases. The team handles everything from APFS filesystem repair to RAID 0/1/5 reconstruction and NVMe SSD recovery, backed by Free Diagnostics and a no recovery, no charge policy that’s been standard practice since 2006. If your library sits on a drive that’s clicking, was dropped, or simply won’t cooperate after every DIY step above, review the hard drive data recovery options or call 310-866-0828 to book a same-day diagnostic today.
Sources
- Repair your photo library on Mac – Apple Support
- How To Fix A Damaged macOS Photos Library When The Repair Tool Fails – Forbes
- How to use Photos Repair Library Tool on Mac – iGeeksBlog
- Data recovery techniques: a practical guide for 2026
FAQ
How Do I Fix a Corrupted iPhoto or Photos Library?
Quit the app, then relaunch while holding Command and Option to trigger the built-in Repair Library tool. If that fails, run Disk Utility First Aid on the drive, then try the manual Masters folder extraction method before contacting a professional.
Why Do Photos Libraries Get Corrupted in the First Place?
The most common causes are interrupted writes from power loss or unsafe drive ejection, underlying drive hardware failures, problematic imports, and interrupted iCloud Photos syncs.
Is There a Way to Fix Corrupted Photos Without Losing Everything?
Yes. Copying the Masters folder in sections isolates which specific files are damaged, letting you recover everything else and reimport it into a fresh library, since the database and image files fail independently.
Can I Repair a Photos Library Stored on an External Drive?
Sometimes, but permission conflicts and incompatible formats like exFAT often block the repair tool on external volumes, so copying the library to internal storage first usually gets better results.
When Should I Stop Trying DIY Fixes and Call a Professional?
Stop immediately if the drive makes unusual noises, suffered physical damage, or if repeated copy attempts keep failing across most of the library. Call Macwest Data Recovery at 310-866-0828 for Free Diagnostics before attempting anything further.