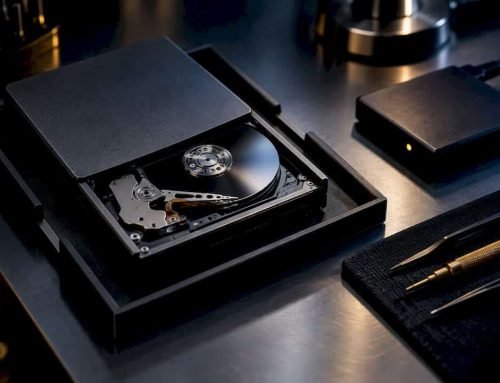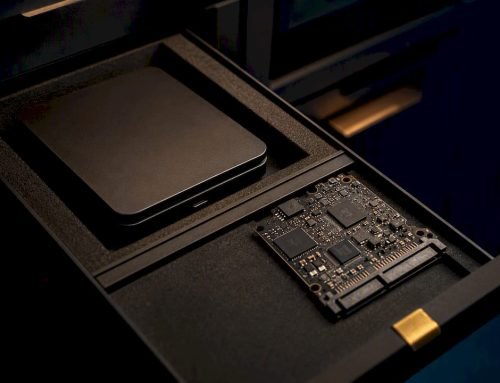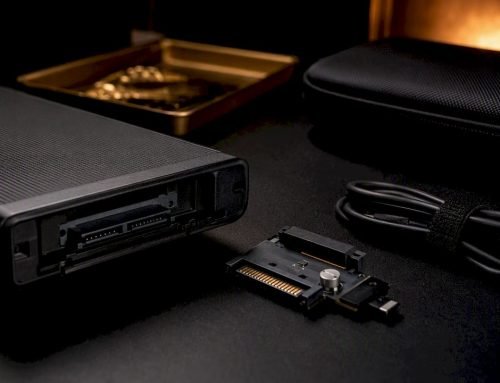
Stop all disk writes immediately. If Windows Disk Management labels your drive “Not Initialized,” do not click Initialize. That single click writes a fresh partition table over the one currently hiding your files, so the safest next move is a read-only diagnostic followed by a full disk image, not a repair attempt. If the drive still reports its correct capacity and spins normally, your files are usually still recoverable; if it clicks, beeps, or shows 0 bytes, power it off and get professional hands on it before anything else touches that disk.
TL;DR:
- If a drive is labeled “Not Initialized,” do not click Initialize, as it overwrites the partition table and risks losing your data.
- Confirm whether the drive shows as unallocated space with correct capacity, no media, or 0 bytes, to identify hardware failure versus partition corruption.
- Perform basic hardware checks: swap cables, test on another computer, and connect drives directly via SATA to rule out enclosure or connection issues.
- Always create a full disk image before attempting repairs; use read-only tools to scan and preview recoverable files on the image instead of the live disk.
- Signs of physical failure, such as clicking noises or capacity at 0 bytes, require professional recovery rather than DIY attempts, to prevent further damage.
Table of Contents
- What “Drive Not Initialized” Actually Means
- Quick Hardware Checks Before You Touch Any Software
- Safe Software Checks That Won’t Destroy Your Data
- How to Recover Files Without Overwriting Anything
- When the Drive Is Physically Failing and DIY Stops Being Safe
- Your Complete Action Checklist, Start to Finish
- Triage Priorities From the Recovery Bench
- How Macwest Data Recovery & Mac Repair Can Help
- Sources
- FAQ
What “Drive Not Initialized” Actually Means
A “Not Initialized” error is not the same thing as a dead drive. It usually means Windows can physically detect the disk’s controller and read its raw capacity, but it cannot find a valid partition table to make sense of what’s stored there. Every drive Windows recognizes needs one of two partitioning schemes, either the older Master Boot Record (MBR) or the newer GUID Partition Table (GPT), sitting in the first sectors of the disk. When that table gets corrupted, overwritten, or scrambled by a bad shutdown, a failing USB bridge, or a virus, Windows still sees the hardware but has no map to the data on it. That’s the “Not Initialized” state.
This distinction matters because the files themselves almost never disappear when the partition table breaks. The MakeUseOf breakdown of the “Disk Unknown Not Initialized” error notes that the error is commonly caused by MBR or GPT corruption, faulty USB cables or ports, outdated disk drivers, or genuine physical hardware failure, and that physical failure tends to announce itself with unusual noises or a drive that reports 0 bytes.
Disk Management gives you three very different readings, and telling them apart early saves you from panicking or, worse, doing nothing when you should act fast:
- Unallocated space with correct capacity: the drive is detected, spins fine, and shows its real size but has no recognized partition. This is the best-case scenario and often just a partition table problem.
- No Media: Windows can’t even read basic disk geometry. This usually points to a connection, driver, or controller issue rather than the file system itself.
- 0 bytes reported: the drive is failing to communicate its true capacity, which is a strong hardware failure signal, not a simple table corruption.
Knowing which of these three you’re looking at tells you whether you’re dealing with a software-level fix or a hardware emergency before you touch a single setting.
Quick Hardware Checks Before You Touch Any Software
Before you open a single recovery tool, rule out the boring stuff. A shocking number of “drive not initialized” cases trace back to a bad cable or a flaky USB-to-SATA bridge inside an external enclosure rather than anything wrong with the disk itself. In fact, MakeUseOf’s troubleshooting guide points out that removing a drive from a faulty enclosure and connecting it directly often restores its correct capacity and makes recovery possible again.
Work through these checks in order, powering down the system fully between each swap:
- Power down before touching cables. Never hot swap a drive that’s throwing errors. A clean shutdown and reconnect avoids sending a bad electrical signal that could compound existing damage.
- Swap the USB cable and port. Try a different, known-good cable and a different USB port, ideally on a different USB controller (front panel vs. rear panel on a desktop, for example).
- Test on another computer. If a second machine also shows “Not Initialized,” the problem lives on the drive or its enclosure, not your original PC’s drivers.
- Bypass the enclosure if you can. If the drive is a standard SATA disk inside a USB enclosure, pull it out and connect it directly via a SATA cable or a trusted USB dock. Bridge chips fail far more often than the drives they house.
- Check BIOS/UEFI capacity reporting. If your motherboard’s firmware doesn’t see the drive’s correct capacity, you’re almost certainly looking at a hardware or bridge problem, not a Windows partition issue.
- Listen and watch for red flags. Repeated disconnects, clicking, grinding, or a capacity reading of 0 bytes are signs to stop the hardware checks and move straight to imaging or professional recovery.
Microsoft’s own troubleshooting threads for external drives echo this order of operations, flagging adapter and bridge failures alongside firmware and driver issues as common, fixable causes before assuming the platters or NAND themselves are damaged.
Pro Tip: Keep a spare, known-good USB cable and a $15 SATA-to-USB adapter in a drawer. Half the “dead drive” panic calls we get in West LA turn out to be a worn-out cable, and eliminating that variable in two minutes can save you a trip.
Safe Software Checks That Won’t Destroy Your Data
Once you’ve confirmed the connection itself is solid, move to read-only software diagnostics. The goal at this stage is information, not repair. Anything that writes to the disk, including Windows’ own “Initialize Disk” prompt, stays off the table until you’ve imaged the drive.
Start with drivers. An outdated or corrupted disk controller driver can make a perfectly healthy drive look unreadable to Windows. Open Device Manager, find the drive under “Disk drives,” and update or reinstall the driver. This alone resolves a meaningful share of detection errors, especially on external enclosures using generic USB-to-SATA or USB-to-NVMe bridge chips.
Next, open Disk Management purely to look, not to act. If it shows the drive with correct capacity as “Unallocated,” that’s useful confirmation the physical layer is fine and you’re dealing with a logical partition problem. Do not right-click and select Initialize. As Refindo’s guide to the error explains, initializing writes a brand-new MBR or GPT structure. It doesn’t format the actual data regions, but it does overwrite the partition entries that any recovery tool needs to locate your files.
DiskPart, Windows’ command-line disk utility, is genuinely useful here if you stick to inspection commands:
list diskshows every disk Windows sees and its reported size, confirming whether capacity matches the label on the drive itself.select disk ntargets the specific disk for the next command, wherenis the disk number from the previous step.detail diskreports status, whether the disk is online or offline, and low-level attributes like read-only flags.
Stop there. Do not run clean, convert gpt, or convert mbr until after you’ve made a full disk image. Those commands are destructive by design.
For actually finding and previewing your files without writing anything, four tools come up again and again in recovery workflows, and each has a slightly different strength. TestDisk, a free utility from CGSecurity, scans a disk by signature rather than relying on the (broken) partition table, and can locate lost partitions and rebuild partition structures in many cases when it’s run against an image rather than the live disk. Refindo offers a guided interface for diagnosing this exact “Not Initialized” scenario and walking through safe next steps. Disk Drill runs a read-only deep scan that previews recoverable files before you commit to restoring anything, which matters because you want to see what’s salvageable before you choose a destination drive. MyRecover focuses on straightforward file-level recovery with preview, a good option if you just need specific documents or photos back rather than a full partition rebuild. All four share the same underlying philosophy: read, don’t write, until you know what’s there.
How to Recover Files Without Overwriting Anything
The single most important step in this entire process is creating a byte-for-byte image of the drive before you attempt any repair, and doing that recovery work on the copy rather than the original. This is standard practice in professional labs for a reason: it gives you unlimited attempts at recovery without ever risking the one copy of your data that still exists.
- Connect a second, larger drive to hold the image. It needs to be at least as large as the source drive’s total reported capacity, not just the amount of data you think is on it.
- Create the disk image. Free tools capable of sector-by-sector imaging include TestDisk’s companion utilities and various open-source imaging tools; the goal is a raw, complete copy, not a selective file backup. Guidance on recovering uninitialized disks consistently recommends this byte-for-byte approach specifically so you can attempt repairs on the image while the original stays untouched.
- Run your read-only scan against the image, not the live drive. TestDisk, Disk Drill, or MyRecover can all target an image file just as they’d target a physical disk.
- Preview before you recover. Confirm the files that show up are intact and named correctly, not just fragments, before committing to a recovery destination.
- Recover to a third, separate drive. Never recover files back onto the original disk or even onto the drive holding your image. You want three physically distinct pieces of storage in play: the original, the image, and the recovery destination.
- Attempt non-destructive MBR/GPT rebuilds only after imaging. Some partition tools, including AOMEI Partition Assistant, offer MBR rebuild and surface-scan features that can restore a working table without touching existing data sectors, but only run these against a drive you’ve already imaged.
- Initialize only as an absolute last resort, and only on a drive confirmed empty or already fully recovered. Once you’ve verified every file is safely copied elsewhere, initializing the original disk is just prepping it for reuse, not a data-recovery step.
Here’s how the common symptoms map to the right response, so you’re not guessing which lane you’re in:
| Symptom in Disk Management | Likely Cause | Safe Next Step |
|---|---|---|
| Unallocated, correct capacity shown | Partition table corruption | Image the drive, then run TestDisk or Disk Drill on the image |
| No Media detected | Connection, driver, or bridge failure | Swap cable/port, update driver, try direct SATA connection |
| 0 bytes reported | Likely hardware failure | Stop immediately, do not attempt imaging repeatedly, contact a lab |
| Drive disconnects repeatedly during scan | Failing controller or connector | Power off, do not force repeated reconnections |
| Clicking or grinding noise | Mechanical failure | Power off immediately, professional recovery only |
When the Drive Is Physically Failing and DIY Stops Being Safe
Certain symptoms mean you should close every recovery tool and pick up the phone instead. Mechanical clicking, repeated beeping, a drive that spins up and then immediately spins down, or a capacity reading stuck at 0 bytes are all signs of a hardware problem no software can fix. Continuing to power-cycle a drive making these noises, or forcing repeated imaging attempts on a disk that keeps disconnecting mid-scan, tends to make the underlying damage worse, not better.
Watch for these specific stop signals:
- The drive makes clicking, ticking, or grinding sounds when powered on.
- It reports 0 bytes or an impossible capacity in Disk Management or BIOS.
- It runs hot to the touch or shuts itself off after a few minutes of use.
- An imaging attempt fails partway through or the drive disconnects and reconnects repeatedly during the process.
- The drive was dropped, exposed to liquid, or suffered a power surge right before the error appeared.
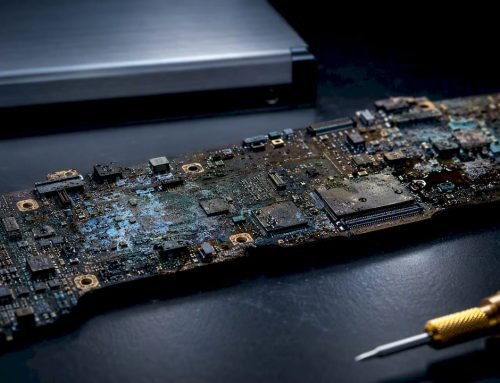
When any of these show up, professional labs bring tools a home setup simply doesn’t have: clean-room environments for opening sealed drive enclosures without contaminating the platters, donor parts for controller-level swaps, and specialized equipment for reading data directly off NAND chips or damaged logic boards. This is where component-level repair and forensic imaging genuinely separate professional recovery from anything you can do at a desk, particularly on modern NVMe SSDs where the controller and memory are often soldered directly to the board with no user-serviceable parts at all.
Your Complete Action Checklist, Start to Finish
Run through this in order. Skipping steps, especially the imaging step, is where most DIY recovery attempts go wrong.
- Stop all disk writes immediately. Close any program that might be actively writing to the affected drive, and resist the urge to click Initialize.
- Disconnect safely. Use “Safely Remove Hardware” if the drive is still responsive, or power down the system cleanly if it isn’t.
- Run the basic hardware checks. Swap the cable, try a different port, test on another computer, and bypass the enclosure if the drive is a standard SATA disk inside one.
- Confirm the reading in Disk Management and BIOS. If both show the drive’s correct capacity as “Unallocated,” you’re clear to proceed with software recovery.
- Image the drive first, always. Create a full byte-for-byte copy on a separate physical drive before running any repair or partition tool.
- Run a read-only scan on the image. Use TestDisk, Refindo, Disk Drill, or MyRecover to locate and preview recoverable files.
- Recover files to a third drive, never back onto the source or the image drive.
- Attempt a non-destructive partition rebuild, if needed, using a tool like AOMEI Partition Assistant, only after imaging is complete.
- If the drive clicks, beeps, reports 0 bytes, or disconnects mid-scan, stop immediately. Power it off and contact a professional data recovery provider rather than continuing to experiment.
- Verify recovered files before considering the job done, and only initialize the original drive if you intend to reuse it and have confirmed everything important is already safely copied elsewhere.
Pro Tip: If you’re not sure whether your drive falls into the “safe to keep trying” category or the “stop now” category, treat any uncertainty as a stop signal. An extra day spent getting a professional opinion costs far less than a failed DIY imaging attempt on a drive that was already on its last legs.
Triage Priorities From the Recovery Bench
Most partition-table failures are recoverable, provided nobody writes to the disk before a proper image exists. The mistake we see constantly isn’t a lack of technical skill. It’s impatience: someone runs clean in DiskPart, clicks Initialize to “just see what happens,” or tries five different tools directly on the failing drive instead of on an image, and each pass reduces what’s left to recover. When a drive is genuinely time-sensitive, whether that’s a business RAID array or a semester’s worth of thesis files, imaging-first triage on the day it comes in preserves every option for the technician who works it next.
— Kaya
How Macwest Data Recovery & Mac Repair Can Help
If your drive is clicking, reporting 0 bytes, or you’d rather not risk a DIY imaging attempt on your only copy of irreplaceable files, Macwest Data Recovery & Mac Repair has been handling exactly this kind of case in Los Angeles since 2006. We serve West LA, Santa Monica, Beverly Hills, Brentwood, Westwood, Venice, Hollywood, and Culver City, with our lab centrally located at 12041 Wilshire Blvd, Ste 26, between the 405 and Santa Monica, close to UCLA and the Getty Center. Unlike a mail-in service that keeps your drive out of reach for weeks, our in-house lab handles hard drive and SSD recovery, RAID and NVMe recovery, and logic board component repair on-site, with Free Diagnostics and a No recovery, no charge policy on every job. For drives showing mechanical failure, controller damage, or repeated disconnects, that in-house setup means no shipping delays and no guessing whether your drive survived the trip.
We offer Same-day appointments for cases where every hour matters, including SSD-specific recovery on drives that show similar “not initialized” symptoms but fail differently than spinning platters. Call 310-866-0828 and bring the drive itself along with a quick rundown of the symptoms you’ve seen, any error messages Windows displayed, and whether you’ve already attempted a fix, so we can start diagnostics the moment you arrive.
Sources
- How to Fix the “Disk Unknown Not Initialized” Issue on Windows
- Disk Unknown, Not Initialized on Windows | Refindo
- TestDisk — CGSecurity
- How to Recover Data from an Uninitialized Disk in 2026
FAQ
How do I fix a drive that shows as not initialized?
Image the drive first, then run a read-only scan with a tool like TestDisk or Disk Drill to recover your files before attempting any partition repair. Never click Initialize in Disk Management until every file you need has been recovered to separate media, since initializing overwrites the existing partition table.
How do I force a disk to initialize?
Right-clicking the disk in Disk Management and choosing “Initialize Disk” forces Windows to write a new MBR or GPT structure, but you should only do this on a drive that’s confirmed empty or fully recovered already. Forcing initialization on a drive that still holds unrecovered data destroys the partition map you’d need to get those files back.
What does “not initialized” mean?
It means Windows detects the drive’s hardware but can’t find a valid partition table telling it how the storage is organized. The files themselves are often still physically intact, which is why imaging the disk before any repair gives you the best shot at getting them back.
How do I fix an SSD that won’t initialize?
The same imaging-first, read-only-scan approach applies, though SSDs fail differently than mechanical drives and often show no warning noise before controller failure. If a NVMe SSD reports 0 bytes or disconnects during an imaging attempt, stop and contact a professional lab rather than continuing, since SSD components are frequently soldered with no accessible parts for DIY intervention.
Does Macwest Data Recovery charge for a diagnosis?
No. Macwest Data Recovery & Mac Repair offers Free Diagnostics on every case, along with a No recovery, no charge policy, so you only pay if the recovery succeeds. Current pricing details for specific services are available through the data recovery services page.