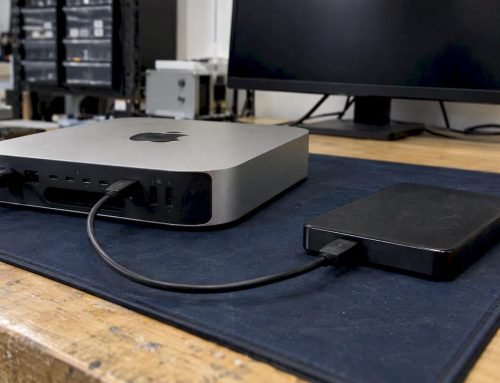
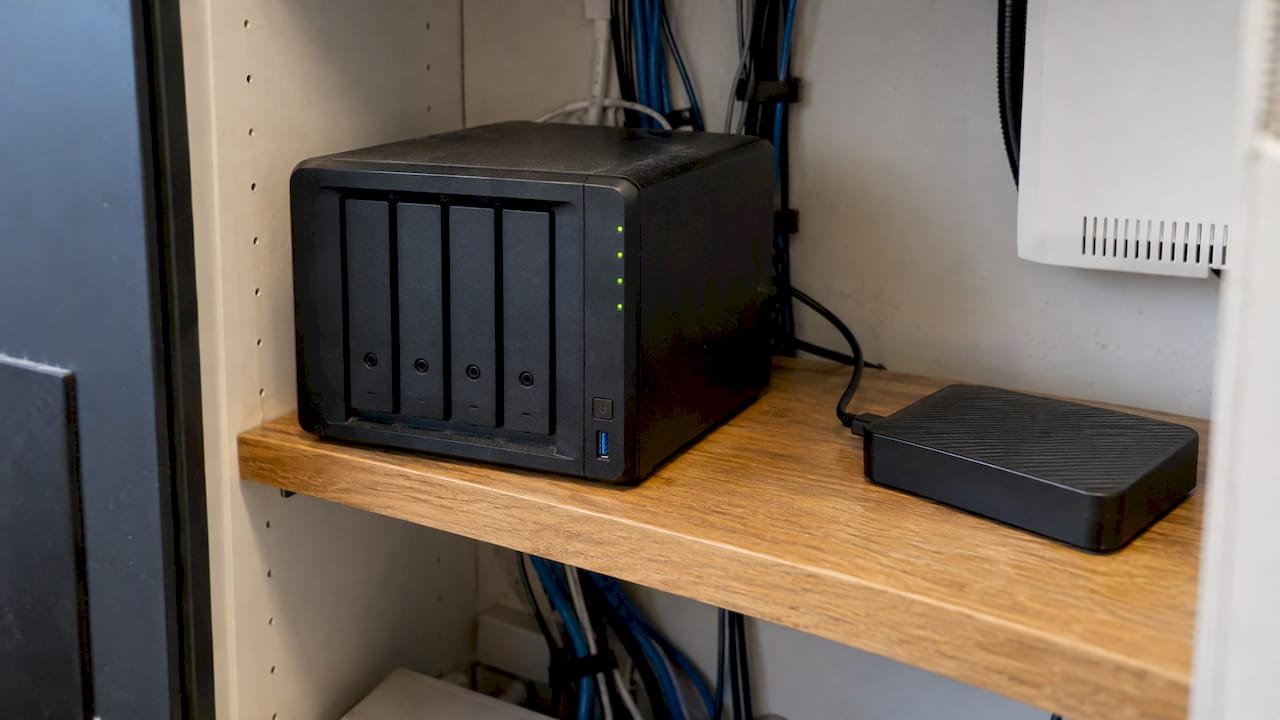
Yes, a Mac can back up to a NAS with Time Machine, provided the NAS shares a folder over SMB and you give that folder its own user and a size quota. Apple confirms that Time Machine works with third-party network storage that supports Time Machine over SMB, and this guide walks through the setup on a Synology, the checks that fix most failed backups, and the point where a NAS backup stops being enough on its own.
We are Macwest Data Recovery & Mac Repair, a Los Angeles lab serving West LA, Santa Monica and Beverly Hills since 2006. Most of what follows comes from the other side of the bench: the Macs and NAS units that arrive after a backup plan quietly failed.
TL;DR
- Time Machine can use a NAS as its destination, but only over SMB. AFP is not recommended and is unsupported in macOS 27 or later.
- On a Synology, create a dedicated shared folder, enable SMB, make a backup-only user, and set a quota of two to three times the data you are protecting.
- If backups fail, check free space, SMB3, the local network and security software before anything else.
- A NAS copy is one copy. Add an offsite or separate-media copy, and call us on (310) 866-0828 if a Mac or NAS has already lost data.
Table of Contents
- Can Time Machine back up to a NAS?
- What you need before you start
- Set up Time Machine on a Synology NAS
- Other NAS brands
- What Time Machine does and does not back up
- Time Machine vs. Carbon Copy Cloner
- When Time Machine cannot connect or finish on the NAS
- If your Mac or NAS has already lost data
- Build a backup plan that survives a NAS failure
- Our perspective: a backup you have never restored is a guess
- Same-day help in West LA
- FAQ
- Sources
Can Time Machine back up to a NAS?
It can, and it is a sound arrangement for a household or small office with several Macs. Apple’s documentation lists a directly connected drive or a NAS that supports Time Machine over SMB as valid destinations and recommends SMB when both SMB and AFP are offered.
The practical trade-offs against a drive plugged into the Mac are these:
| Factor | NAS over the network | Direct-attached (DAS) drive |
|---|---|---|
| Number of Macs served | Many, from one box | One Mac per drive, usually |
| Backup speed | Limited by Wi-Fi or Ethernet, slower first run | Limited by the port, usually faster |
| Backups when away from home | Only on the same network or by VPN | Whenever the drive is connected |
| Built-in redundancy | Yes, with RAID 1, 5 or similar | None unless you add it |
| Typical failure | Network, SMB or permissions errors | Drive failure or unplugged cable |
| Cost per Mac | Lower with several Macs | Lower with one Mac |
If you have one laptop that travels, a DAS drive is simpler. If you have two or more Macs and a desk where Ethernet is available, a NAS is the better fit.
What you need before you start
- A NAS that advertises Time Machine support over SMB. Synology, QNAP, TrueNAS and others do; check your model’s current documentation.
- Free capacity. Synology recommends a quota of at least two to three times the size of the Mac drive or the data being backed up.
- A wired connection for the first backup if you can manage one. The first run copies everything, and Wi-Fi turns hours into days.
- Administrator access to both the NAS and the Mac.
Set up Time Machine on a Synology NAS
Synology’s own Time Machine tutorial says to create a shared folder, enable SMB and give a DSM user read/write permission on that folder. Menu names shift slightly between DSM versions, so use the steps below as the sequence and the Synology page as the reference.
Step 1: Create a dedicated shared folder
In DSM, create a new shared folder used only for Time Machine, for example “TimeMachine”. Keep it separate from your photos, documents and media. A dedicated folder lets you cap its size without touching anything else.
Step 2: Create a backup-only user
Add a DSM user such as “tmbackup” with read/write permission on that folder and no access elsewhere. Using a restricted account means a compromised Mac login cannot reach the rest of the NAS.
Step 3: Enable SMB and Time Machine broadcasting
Turn on the SMB service in the file services settings, then enable Bonjour broadcasting for Time Machine on the shared folder so Macs can discover it. Synology describes the Bonjour and SMB settings for the backup target on the same page.
Step 4: Set a quota
Without a limit, Time Machine keeps growing until the volume is full, which also starves your other shares. Synology’s backup solution guide recommends a size limit on the Time Machine folder for exactly this reason. Use the two-to-three-times rule: a 1 TB Mac gets a 2 to 3 TB quota.
Step 5: Point the Mac at the share
On the Mac, open System Settings, go to General, then Time Machine, and add a backup disk. Choose the NAS share, sign in with the backup user, and decide whether to encrypt the backup. Encryption is worth turning on for a laptop that holds client files, and you must store the password somewhere other than that Mac.
Step 6: Run the first backup
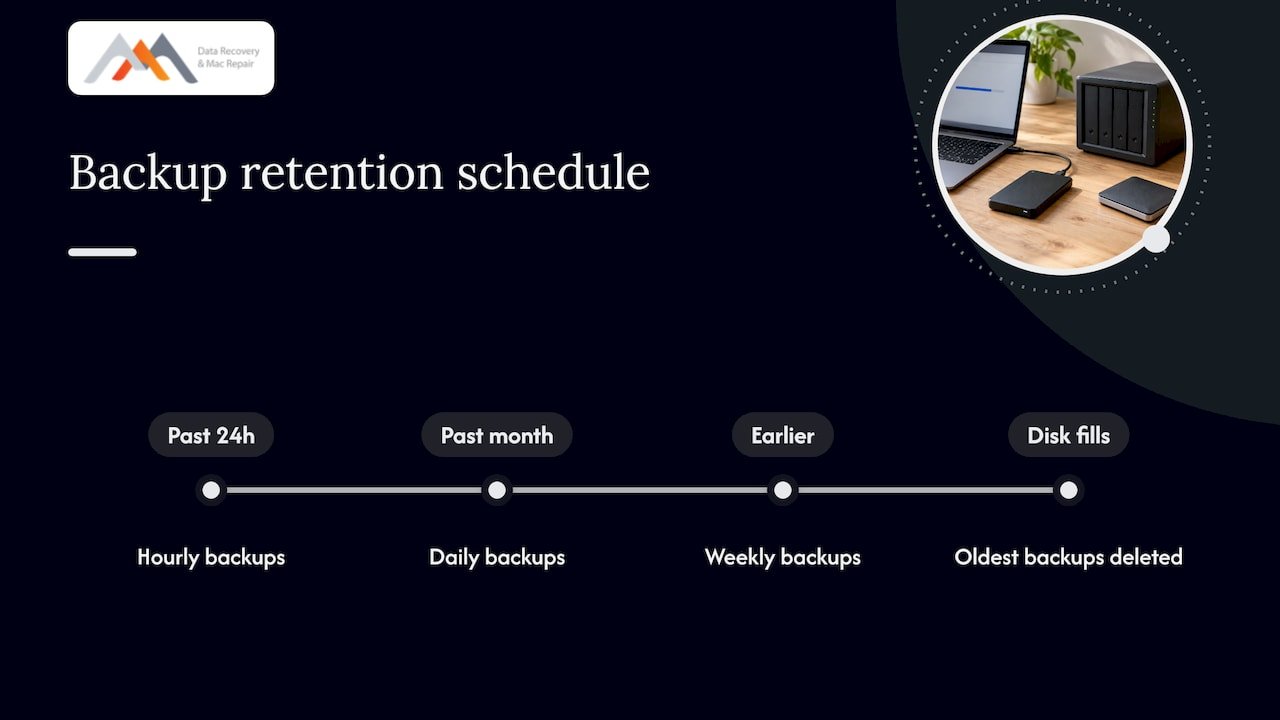
Plug the Mac into Ethernet, keep it awake and let the first backup finish. After that, Time Machine only copies files changed since the last run. By default it keeps hourly backups for the past 24 hours, daily backups for the past month and weekly backups for earlier months, and deletes the oldest ones when the disk fills.
Other NAS brands
The logic is identical on any brand: a share that speaks SMB, a dedicated account, a size limit and Time Machine support switched on. The menu names differ. Apple’s requirement is the constant: the NAS must support Time Machine over SMB, and AFP is the legacy path to avoid.
What Time Machine does and does not back up
Time Machine backs up your apps, music, photos, email and documents, and it can restore older versions of files and ones you have deleted, according to Apple’s overview. It is not a complete record of everything, though:
- System files and apps installed with macOS are not backed up, and neither are items on its exclusion list.
- In rare cases, settings in non-Apple software can stop that software’s files from being backed up.
- iCloud is not a substitute. Apple’s iMac guide notes that iCloud stores only the documents and data you choose to sync, not the entire Mac.
- On modern macOS, the operating system sits on a sealed system volume, kept apart from your personal files, and a restore may require installing a newer macOS version.
Open the exclusion list under Time Machine options once after setup. Developers often exclude large folders such as virtual machine images or caches, and they forget they did.
Time Machine vs. Carbon Copy Cloner
The two tools do different jobs, and many people end up using both. Time Machine is versioned: it archives older copies of files so you can go back in time. Cloning software such as Carbon Copy Cloner makes a copy of a volume that you can use for migration or as a replacement drive. Macworld cautions that a straightforward clone does not let you go backward, so you should keep other forms of backup.
| Question | Time Machine | Cloning tool (such as CCC) |
|---|---|---|
| Main purpose | Versioned history and file-level restore | A copy of a volume for replacement or migration |
| Can recover a file you deleted last week | Yes, if still retained | Only if the clone has not yet overwritten it |
| Best destination | NAS or external drive | Directly attached drive, or a network volume |
| Setup effort | Minutes | Task configuration |
| Cost | Included with macOS | Paid software |
The sensible split: Time Machine to the NAS for history, a periodic clone to a separate drive for fast recovery. Do not put both on the same physical disk. Macworld’s Glenn Fleishman argues for dissimilar backups on separate media, since one drive failure, theft or disaster would otherwise take both.
When Time Machine cannot connect or finish on the NAS
Most failures come from a short list of causes. Synology’s troubleshooting page points to the NAS configuration and free space, the Mac and NAS being on the same local network and connected via SMB3, and security software interference. If it still fails, collect the Time Machine logs in Terminal before you change anything else.
Work through the checks in this order:
- Free space. Confirm the volume has room and that the Time Machine quota has not been reached.
- Same network. The Mac and the NAS must be on the same LAN. Guest Wi-Fi, a VPN or a separate VLAN breaks discovery.
- SMB3. Confirm SMB is enabled on the NAS and set to negotiate SMB3.
- Security software. Synology notes that antivirus and security products, including Bitdefender, Norton and Sophos Home, have been identified as possible causes. Pause them briefly to test.
- Credentials and permissions. Re-enter the backup user’s password and confirm read/write permission on the folder.
- Logs. Gather Time Machine logs if the error persists, then ask Synology support or an IT professional to read them.
The classic symptom is a message that the sparsebundle disk image could not be accessed. That usually means a permissions, space or connection problem rather than a damaged Mac. Our own Time Machine stuck checklist covers the Mac-side checks in more detail.
| Symptom | Likely cause | First check |
|---|---|---|
| “Connecting to backup disk” never finishes | Network or SMB negotiation | Same LAN, SMB3 enabled |
| Sparsebundle could not be accessed | Permissions, quota or interrupted run | User rights, free space |
| Backup starts then stalls | Security software or sleep | Pause antivirus, keep Mac awake |
| “Not enough space” despite free NAS space | Quota too small | Raise the folder quota |
| NAS not visible | Bonjour broadcasting off | Re-enable Time Machine on the share |
If your Mac or NAS has already lost data
Stop all disk writes immediately. Do not keep running Time Machine, do not initialize a volume, and do not rebuild a degraded array to “see if it comes back.” Every write can overwrite the blocks you need.
What to do depends on which side failed:
- The Mac’s SSD will not mount, or the Mac will not boot. Modern Macs use APFS on soldered NVMe storage with a security chip, so the drive cannot simply be pulled and read. Do not keep power-cycling or open the case. This is a job for component-level logic board work and controlled NAND access. See our SSD recovery workflow and why SSD data can vanish quickly.
- The NAS shows a degraded or crashed volume. Power it down. RAID 1 mirrors survive one disk failure, RAID 5 survives one, and RAID 0 survives none, so a striped array with one dead disk is a recovery case. Rebuilding blindly on a disk that is already failing is how recoverable arrays become unrecoverable. Read about RAID 0 failures and our step-by-step RAID recovery guide.
- The backup is on the NAS, but the Mac is also dead. Both are at risk. Bring both to the lab rather than testing one at a time.
Build a backup plan that survives a NAS failure
A NAS is a single device in a single room. A fire, theft, power surge or ransomware event hits the Mac and its backup together. The common safeguard is the 3-2-1 rule: at least three copies of your data, on two different types of media, with one copy offsite. The rule is described in a widely cited Time Machine deep dive that also warns relying only on Time Machine will eventually fail.
A reasonable layout for a West LA home office:
- The Mac’s internal drive, the working copy.
- Time Machine to the NAS, for hourly history.
- An encrypted cloud or offsite copy of irreplaceable folders. If you want a wider view of designing this layer, this overview of a cloud backup strategy is a good starting point, and our guide to hard drive backup to cloud compares options.
- Optionally, a periodic clone to a separate external drive that you keep elsewhere.
On the NAS itself, use RAID for uptime and snapshots for accidental deletion, but treat neither as a backup. Synology says snapshots use little extra storage and that High Availability can replicate data to a passive server that takes over if the active one fails. Those features are for larger deployments. For a home or small office, a second copy on different hardware is the cheaper step.
For more habits worth adopting, see our Mac data loss prevention guide and why Macs need backup.
Our perspective: a backup you have never restored is a guess
In nearly twenty years of Mac and RAID recovery work in Los Angeles, the pattern is consistent. The people who lose data are rarely people with no backup. They are people with a backup that stopped running months ago, was set up with a quota that quietly filled, or lived on the same device that failed.
Our advice is to test a restore the day you finish setup: pick a document, restore an older version, and confirm you can open it. Check the Time Machine status once a month. Keep the NAS’s disks and the Mac’s SSD healthy, and replace NAS drives of the same age on a schedule rather than one at a time after each fails, since matched drives tend to fail close together.
We would rather you never need us. But when a logic board will not power on, when an APFS volume refuses to mount, or when a RAID 5 has lost two members, component-level repair and forensic imaging are what recover the files, and we do that in-house at our lab on Wilshire Boulevard.
— Kaya
Same-day help in West LA
If your Mac, external drive, NAS or RAID array has stopped responding, we offer free diagnostics and a no recovery, no charge policy, with same-day appointments available. You can review our data recovery services, our RAID recovery work, or our Mac repair service for logic board, liquid damage, screen and battery problems.
We are at 12041 Wilshire Blvd, Ste 26, between the 405 and Santa Monica, near UCLA and the Getty Center, and we serve Westwood, Brentwood, Santa Monica, Beverly Hills, Venice, Hollywood and Culver City. Call (310) 866-0828 to book.
FAQ
Does Time Machine work with any NAS?
No. The NAS must support Time Machine over SMB. Apple recommends SMB over AFP, and AFP transfers to or from NAS devices are unsupported in macOS 27 or later. Check your NAS vendor’s documentation for Time Machine support before buying.
How much NAS space should I give Time Machine?
Synology recommends a quota of at least two to three times the Mac drive or the data being backed up. A 500 GB Mac therefore needs roughly 1 to 1.5 TB. Setting a quota also keeps Time Machine from filling the whole volume.
Is a NAS better than a directly attached drive for backups?
It depends on how many Macs you have and where they work. A NAS serves several Macs and can add RAID redundancy, but backups run only on the local network. A directly attached drive is faster and simpler for a single laptop.
What does Time Machine not back up?
It does not back up system files or apps installed during macOS installation, and files on its exclusion list are skipped. In rare cases, settings in non-Apple software can also keep files from being backed up. Review the exclusion list after setup.
What should I do if my NAS or Mac fails and I need the files?
Stop all disk writes immediately and power the device down. Do not rebuild an array or initialize a drive. Then call a recovery lab: we offer free diagnostics and same-day appointments in West LA at (310) 866-0828.
Sources
- Backup disks you can use with Time Machine, Apple Support
- Types of disks you can use with Time Machine on Mac, Apple Support
- Back up your Mac with Time Machine, Apple Support
- If Time Machine doesn’t back up certain files, Apple Support
- Back up and restore your iMac, Apple Support
- Back up files from Mac to Synology NAS with Time Machine, Synology Knowledge Center
- Limit space taken up by Time Machine backup, Synology Knowledge Center
- Time Machine backup failed, Synology Knowledge Center
- Synology backup solution guide
- How to automate cloning your drives on a Mac, Macworld
- Is it sensible to combine backup types on a single drive? Macworld
- Time Machine Deep Dive, 2015