TL;DR:
- A MacBook data transfer service primarily uses Apple’s Migration Assistant to move user accounts, applications, and files between devices. It supports wired and wireless connections but performs faster with Thunderbolt or USB-C cables, especially for large data sets. When drives are damaged or data is inaccessible, professional recovery services should be used instead of Migration Assistant.
A MacBook data transfer service is defined as any process or tool that moves your files, apps, user accounts, and system settings from one Mac to another, or from a Windows PC to a Mac. Apple’s built-in solution for this is Migration Assistant, a free utility included with every macOS version from Monterey through Sequoia. It supports both Intel and Apple Silicon Macs, uses authenticated connections to protect your passwords and system permissions, and handles everything from documents to app data in a single session. When your source device is damaged or the drive is unreadable, standard migration tools cannot help. That is when professional data recovery services become the right call.
What is a MacBook data transfer service and how does Migration Assistant work?
Migration Assistant is the primary MacBook migration service Apple provides at no cost with every Mac. You can launch it during initial macOS setup or at any time afterward by going to Applications > Utilities > Migration Assistant. The tool supports transfers from an old Mac, a Time Machine backup, or a Windows PC, giving you three distinct starting points depending on what you have available.
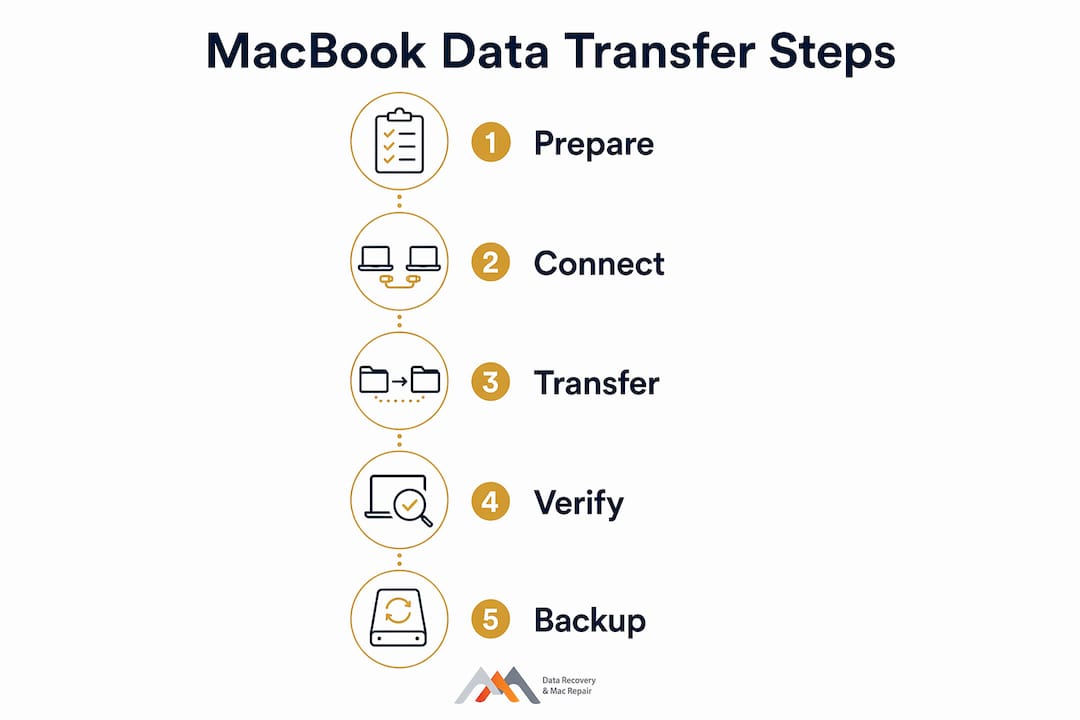
The transfer process follows a clear sequence:
- Open Migration Assistant on both the old and new Mac. On the old Mac, select “To another Mac.” On the new Mac, select “From a Mac, Time Machine backup, or startup disk.”
- Authenticate the connection. Both machines display a matching passcode. Confirm it on both screens before any data moves.
- Select what to transfer. You can migrate everything, or pick specific categories: user accounts, applications, documents, and system settings.
- Wait for the transfer to complete. Depending on data size and connection type, this takes anywhere from 30 minutes to several hours.
- Verify the new Mac. Log in with your migrated account credentials and confirm your apps and files are intact.
Migration Assistant does not delete data on the old device and does not replace macOS on the new one. Your old Mac stays exactly as it was. This makes the process safe to run even if you are unsure whether the transfer completed correctly.
Pro Tip: Run Migration Assistant after initial setup rather than during it if you want to test the new Mac’s performance first. You can always transfer data later without wiping the machine.
What are the fastest and most reliable data transfer methods for MacBook?
Connection type is the single biggest factor in how long your data migration takes. The difference between a wired and wireless transfer is not minor. Wired Thunderbolt or USB-C transfers run at 20–40 GB per minute. Wi-Fi transfers run at 2–5 GB per minute. For a 200 GB dataset, that gap translates to roughly 5 minutes over cable versus over an hour on Wi-Fi.
| Method | Speed | Best for |
|---|---|---|
| Thunderbolt 4 cable | 20–40 GB/min | Large datasets, full migrations |
| USB-C data cable | 10–20 GB/min | Mid-size transfers, most users |
| Wi-Fi (same network) | 2–5 GB/min | Small datasets, no cable available |
| Time Machine backup | Varies by drive | Scheduled backups, incremental transfers |
A few points worth knowing before you start:
- Not all USB-C cables carry data. Cables labeled “charge only” or “power only” will not work for Migration Assistant transfers.
- Thunderbolt 4 cables marked specifically for data transfer deliver the fastest and most consistent speeds.
- Time Machine backups stored on an external NVMe or SSD drive transfer faster than those on a spinning hard drive.
- Wi-Fi transfers are acceptable for datasets under 20 GB but become impractical for full system migrations.
Pro Tip: Buy a Thunderbolt 4 cable rated for data transfer before migration day. A $30 cable can save you two or three hours of transfer time compared to Wi-Fi.
Migration Assistant can also run after initial setup and transfer additional files selectively without touching what is already on the new machine. This is useful if you forgot to include a folder or app category the first time.
What are the common challenges when transferring data to a new MacBook?
The biggest misconception about MacBook data migration is that it produces a clean, optimized new machine. Migration Assistant copies everything on your old Mac, including cached files and unused app data that you may not want. If your old Mac was slow or cluttered, the new one will inherit that clutter immediately after transfer.
Before you start any data migration MacBook process, address these common issues:
- Legacy app leftovers. Apps you uninstalled years ago often leave behind preference files, caches, and support folders. These transfer silently and consume storage on your new Mac.
- Intel app compatibility. Apps built for Intel processors run on Apple Silicon Macs through Rosetta 2, but some require additional setup or updated drivers after migration. Budget extra time for this step if you use specialized software.
- License re-entry. Many commercial apps tie licenses to hardware identifiers. After migration, you may need to deactivate the license on the old Mac and reactivate it on the new one.
- FileVault encryption status. If your old Mac used FileVault, confirm the new Mac’s encryption settings match your security requirements after transfer.
- App Store apps. These typically migrate without issue, but confirm your Apple ID is signed in on the new Mac before launching them.
The alternative to a full migration is a clean install. You set up the new Mac from scratch, reinstall only the apps you actively use, and manually copy the files you need. Clean installs can improve long-term performance, though they require significantly more setup time. The right choice depends on how much digital housekeeping your old Mac needs and how much time you have available.
When should you use professional MacBook data recovery instead of self-transfer?
Standard data migration assumes your source Mac is functional and its drive is readable. The moment that assumption breaks, Migration Assistant cannot help. Professional recovery services handle situations where hardware has failed, drives are corrupted, or data is inaccessible through normal means.
The clearest signs you need professional help rather than a self-service transfer:
- Your Mac does not power on or fails to boot past the startup screen.
- Disk Utility reports the internal drive as unreadable or shows APFS volume errors.
- The Mac suffered liquid damage and you have not yet attempted to power it on. Stop all disk writes immediately if data loss has occurred.
- The SSD is soldered to the logic board and requires NAND-level access to recover data.
- You are working with a RAID 0, RAID 1, RAID 3, or RAID 5 array that has degraded or failed.
Macwestlosangeles has handled MacBook data recovery cases involving liquid damage, failed NVMe drives, and logic board component failures since 2006. The practice offers free diagnostics and operates on a no recovery, no charge basis. That means you pay nothing if the data cannot be retrieved. Same-day appointments are available for urgent cases in West LA, Santa Monica, Beverly Hills, Brentwood, Westwood, Venice, Hollywood, and Culver City.
The distinction between migration and recovery matters practically. Migration moves data from a working device. Recovery extracts data from a device that can no longer function normally. Knowing which situation you are in determines whether you need Apple’s tools or a specialist with MacBook Pro recovery capabilities.
Key Takeaways
A MacBook data transfer service is Apple’s Migration Assistant for functional devices, and professional recovery services for damaged or inaccessible drives.
| Point | Details |
|---|---|
| Migration Assistant is free | Apple includes it with every macOS version; launch it via Applications > Utilities. |
| Wired transfers are fastest | Thunderbolt 4 cables deliver 20–40 GB/min versus 2–5 GB/min over Wi-Fi. |
| Pre-transfer cleanup matters | Migration copies all data including clutter; delete unused apps before you start. |
| Rosetta 2 handles Intel apps | Apple Silicon Macs run Intel apps automatically, but some need license re-entry post-transfer. |
| Professional recovery is different | Damaged or unreadable drives require specialist tools, not Migration Assistant. |
My take on what most MacBook transfer guides get wrong
Most guides treat data migration as a simple copy-and-paste operation. After years of watching clients come in with cluttered new Macs or failed transfers, I can tell you the preparation stage matters more than the transfer itself.
The single most common mistake I see is starting a migration without cleaning up the old Mac first. People transfer 400 GB of data and then wonder why their brand-new MacBook feels sluggish. Half that storage is often old app caches, duplicate photos, and software they have not opened in three years. Spend two hours cleaning before you transfer, and you will save yourself weeks of frustration afterward.
The second mistake is using the wrong cable. Clients regularly show up having spent four hours on a Wi-Fi transfer that would have taken 20 minutes over Thunderbolt 4. The cable matters. Check the label before you plug it in.
The third mistake is assuming Migration Assistant can handle every situation. It cannot. If your old Mac has an APFS volume error, a failing NVMe drive, or any sign of liquid damage, stop and call a specialist before you make the problem worse. Attempting a forced migration from a failing drive can overwrite the very sectors that a recovery technician could have read. The role of experience in recovery is not a marketing phrase. It is the difference between getting your data back and losing it permanently.
— Kaya
Macwestlosangeles: expert Mac repair and data recovery in Los Angeles
Macwestlosangeles has provided Mac repair and data recovery services from its Wilshire Boulevard location since 2006. The team handles everything from standard MacBook repairs to complex data recovery involving APFS volumes, NVMe drives, RAID arrays, and logic board component failures. Free diagnostics are available for every case, and the no recovery, no charge policy means you take no financial risk when the outcome is uncertain. Same-day appointments serve clients across West LA, Santa Monica, Beverly Hills, and surrounding neighborhoods. If your MacBook data transfer has stalled, failed, or involves a damaged device, call 310-866-0828 to speak with a technician directly.
FAQ
What does a MacBook data transfer service include?
A MacBook data transfer service moves your user accounts, applications, documents, and system settings from one Mac to another. Apple’s Migration Assistant handles this automatically for functional devices.
How long does it take to transfer data to a new MacBook?
Transfer time ranges from 30 minutes to several hours depending on data size and connection method. A wired Thunderbolt 4 connection completes most transfers significantly faster than Wi-Fi.
Can Migration Assistant transfer data from a Windows PC?
Yes. Migration Assistant supports transfers from Windows PCs running Windows 7 or later. You install the Windows Migration Assistant app on the PC and connect both devices to the same network.
What happens to my old Mac after migration?
Migration Assistant does not delete any data from your old Mac. Your files, apps, and settings remain intact on the source device after the transfer completes.
When should I call a professional instead of using Migration Assistant?
Call a professional when your Mac does not power on, the drive shows APFS errors, or the device has liquid damage. These situations require specialist recovery tools that go beyond what Migration Assistant can do.